Skip to content

Category: scrapbooking

December Daily Days 10-14

This chunk of my album is dedicated to the time we spent visiting our family and friends in Richmond, Virginia. It was a very busy trip, but it was wonderful to get to spend time with people who are so special to us. We even got to have several different “Christmases” with various family groupings, which Henry was particularly excited about.

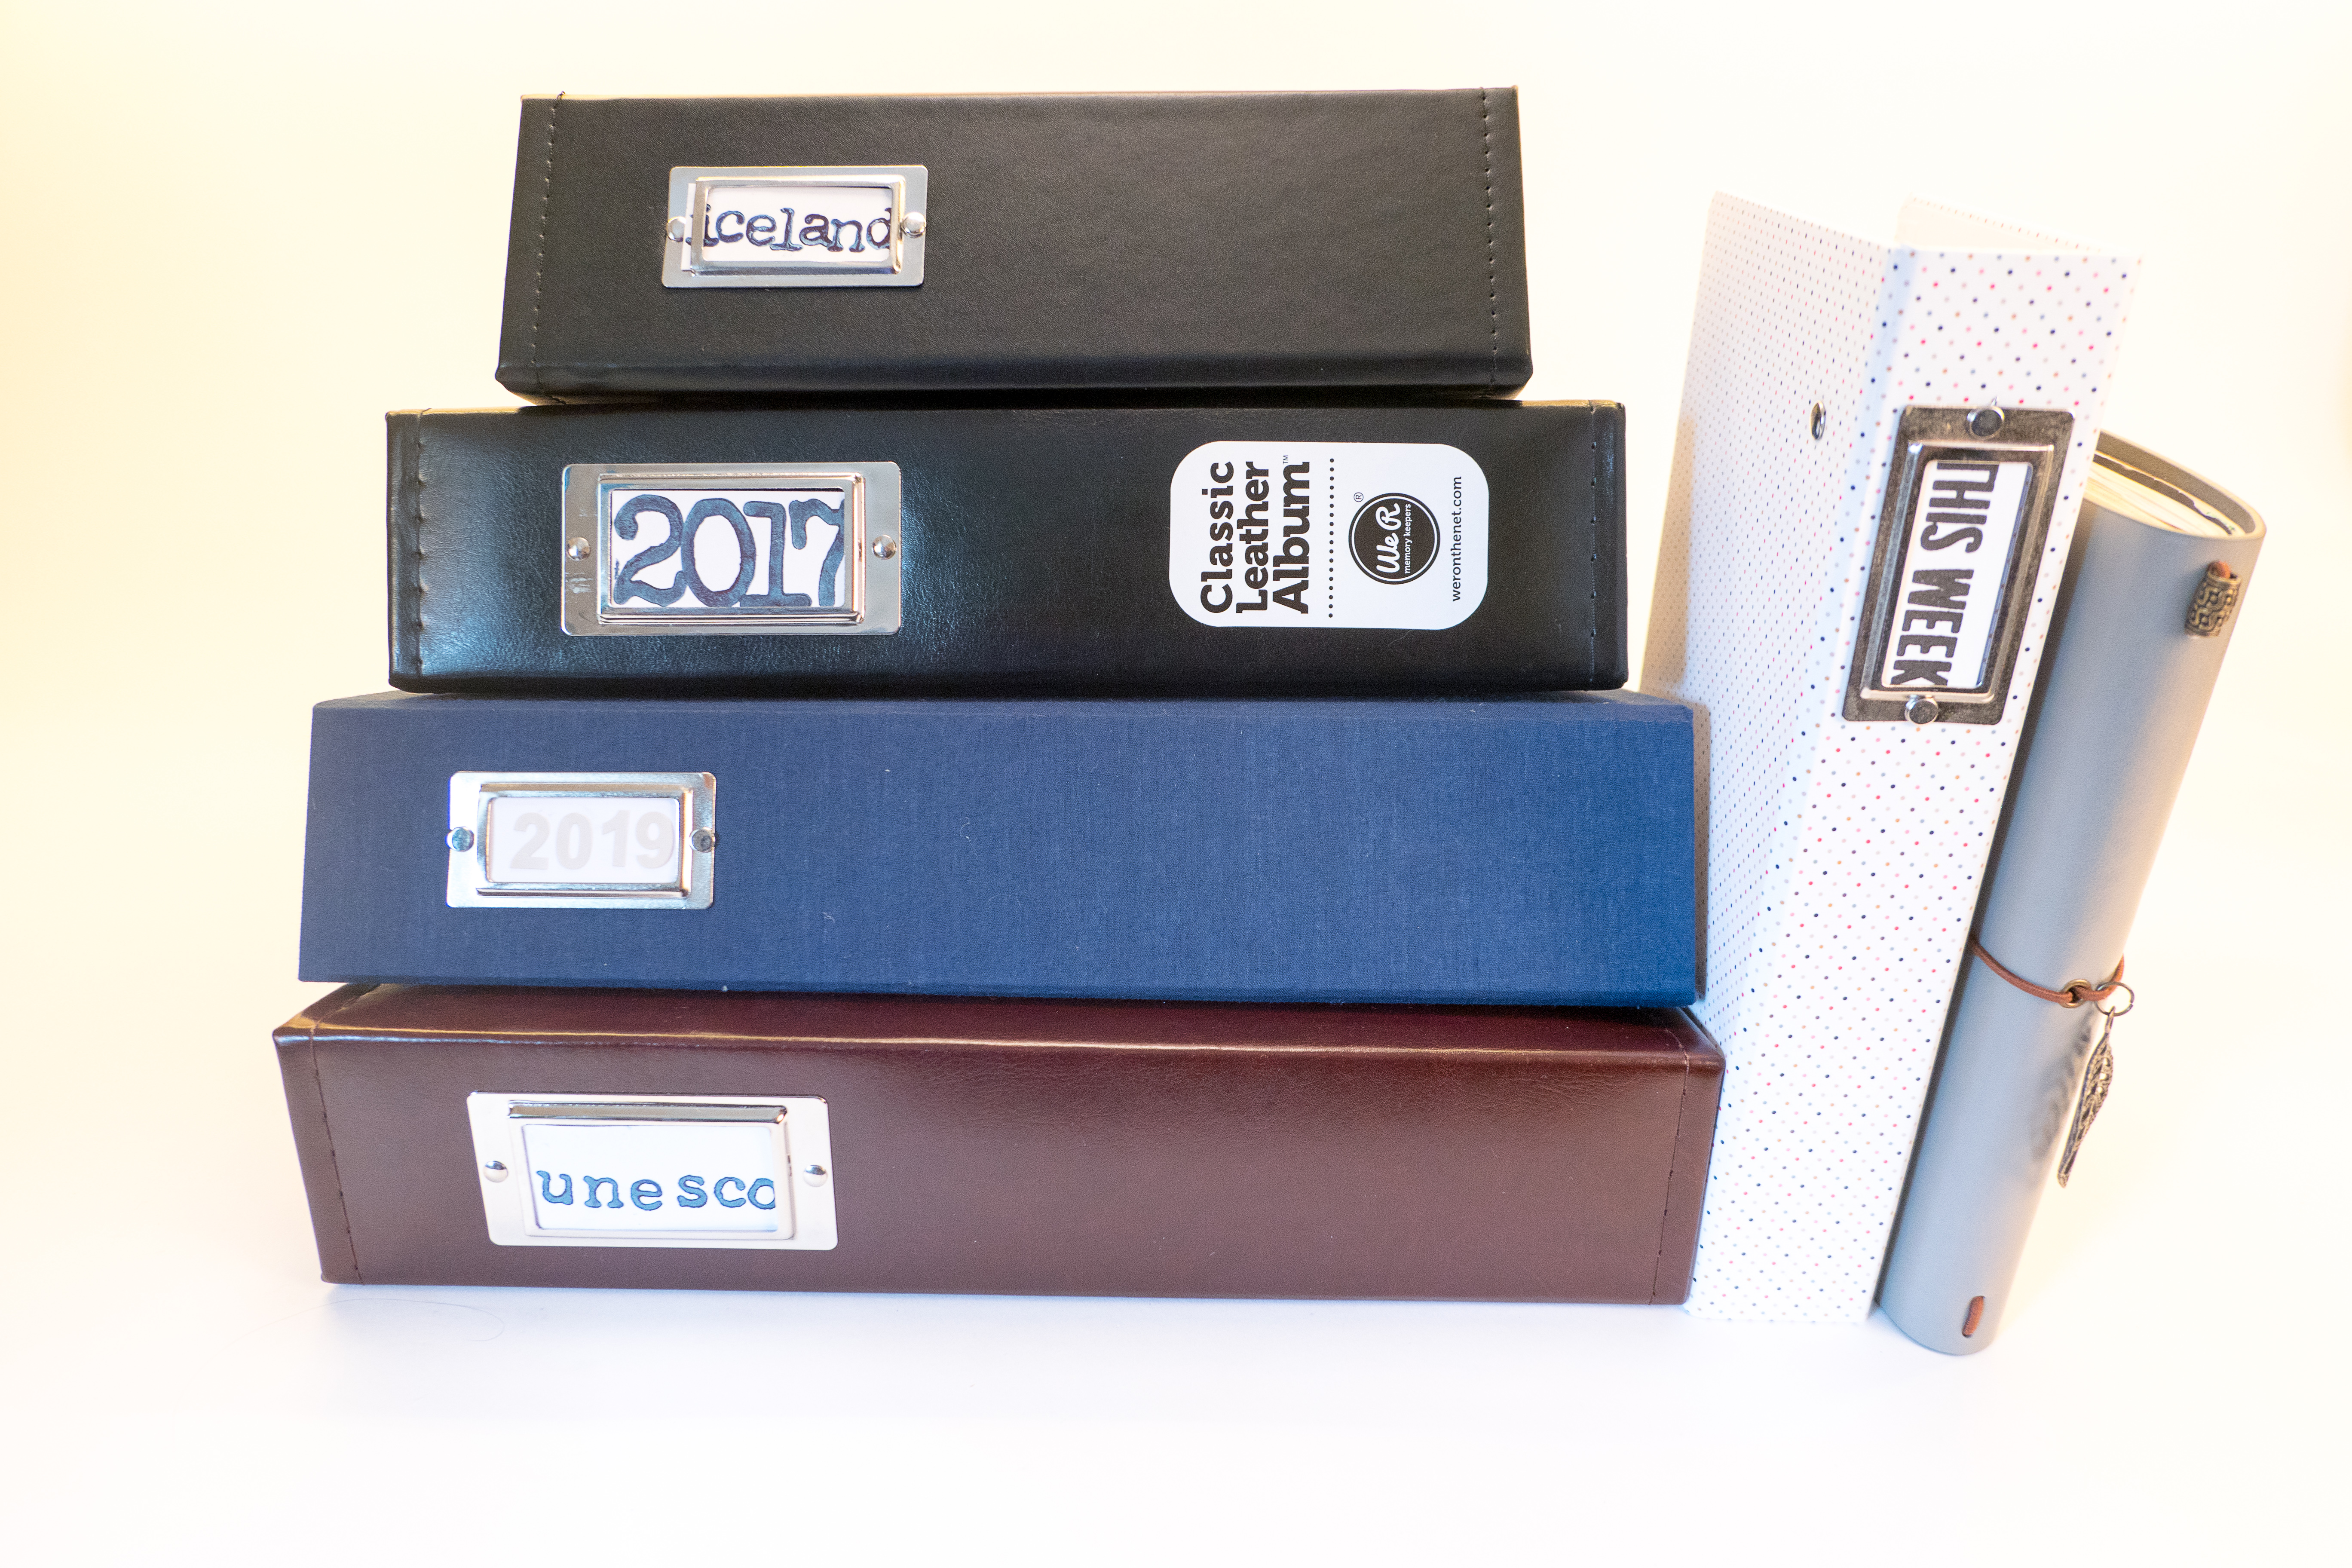
In my last post, I created a complete list of the products and kits I used for my album, so if you are interested in that, you can check it out here.

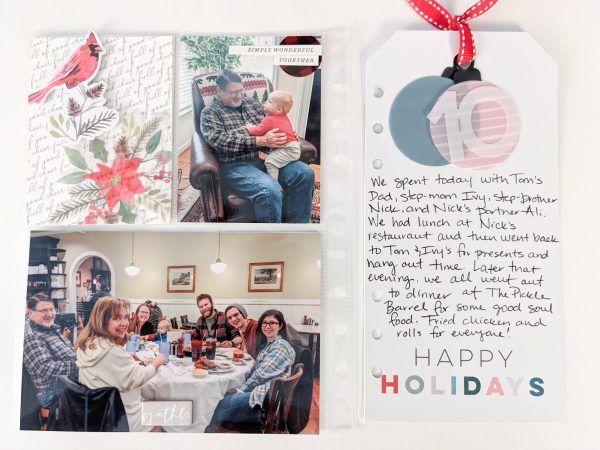
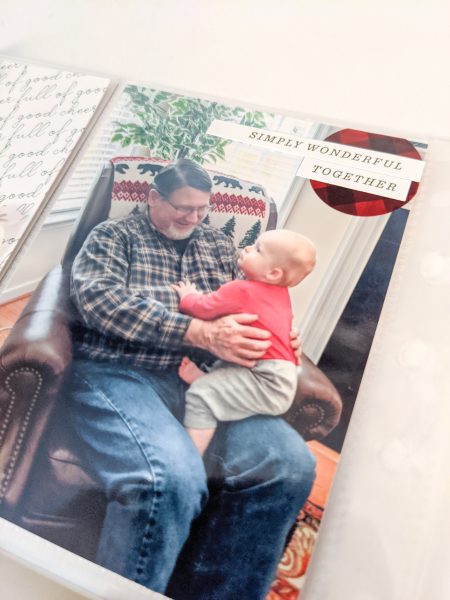
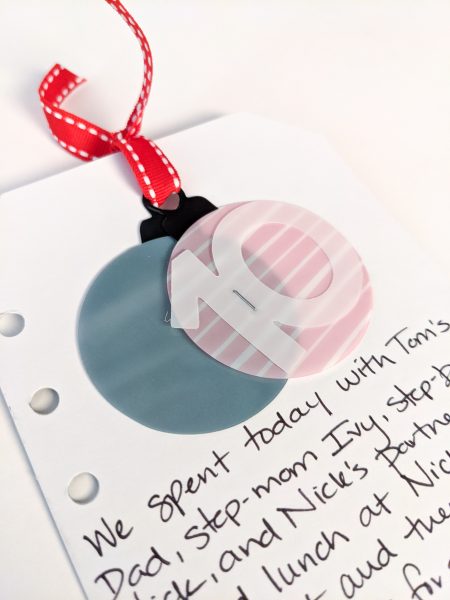
Day 10 was our first full day in Richmond, and we mostly spent it with Tom’s Dad and step-mom. For this layout I paired three 3×4 photos with one 3×4 card embellished with a cardinal on a pop dot. We were in Virginia after all. I also used another one of the large shipping tags from Ali Edwards’ main kit to hold my journaling. I used ribbon to attach two acetate ornaments to the top, and the number fit perfectly into the top ornament. I like how they move freely as the tag turns in the album.

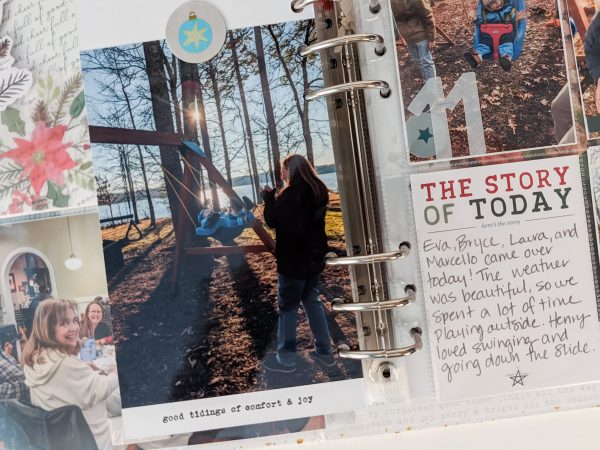
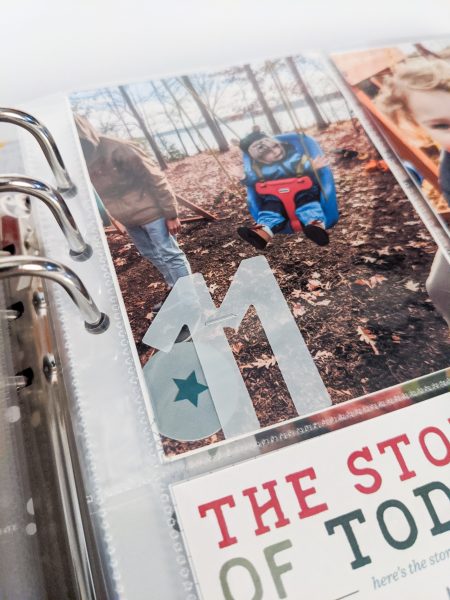
Day 11 was a quiet day at home, for the most part. My best friend, Eva, came over with her youngest little girl to play for the day. Laura and Marcello also joined us. The weather was beautiful, so we spent most of the time outside. I used the back of the large shipping tag to hold a photo, which paired nicely with a 3×4 pocket page. I like the continuity of having the large shipping tags through out the album.

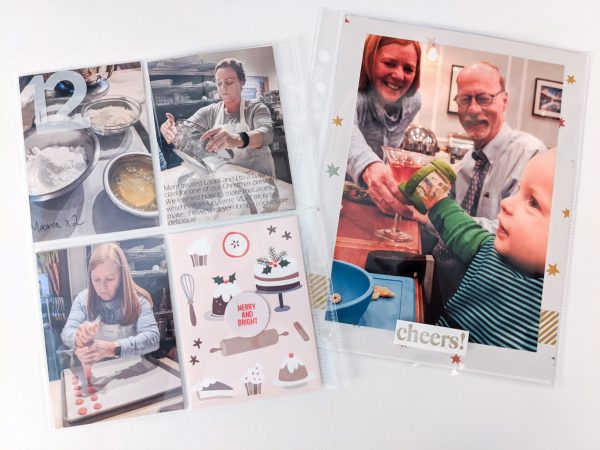
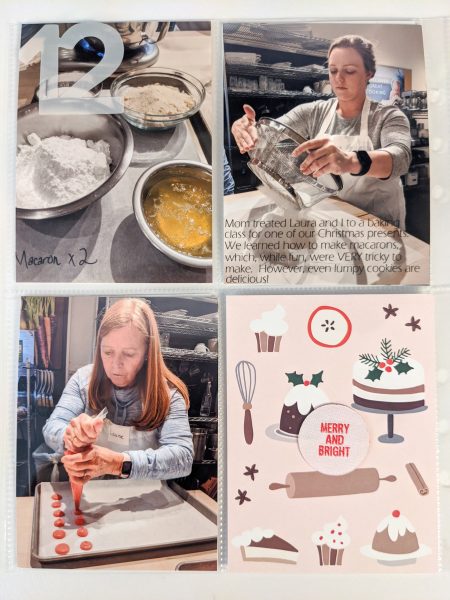
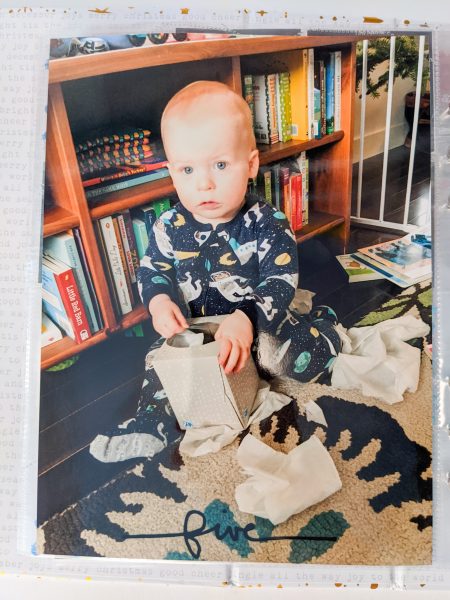
Day 12 was a combination two things we did that day, mostly because I wanted to include that sweet picture of Henry at dinner, and it’s my album, so I make the rules! The main story of the day, however, was how Mom treated Laura and I to a cooking class as one of our Christmas presents. We learned how to make French macarons, which were really quite tricky.

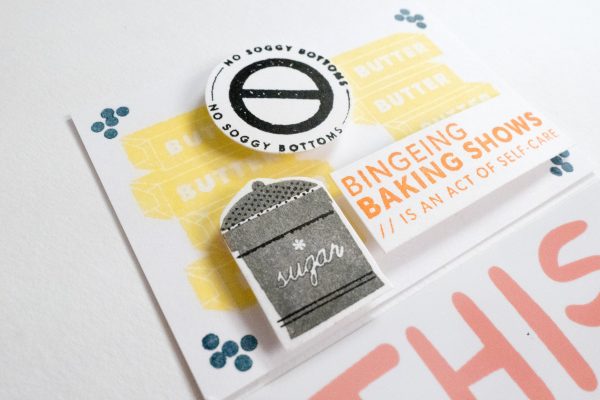
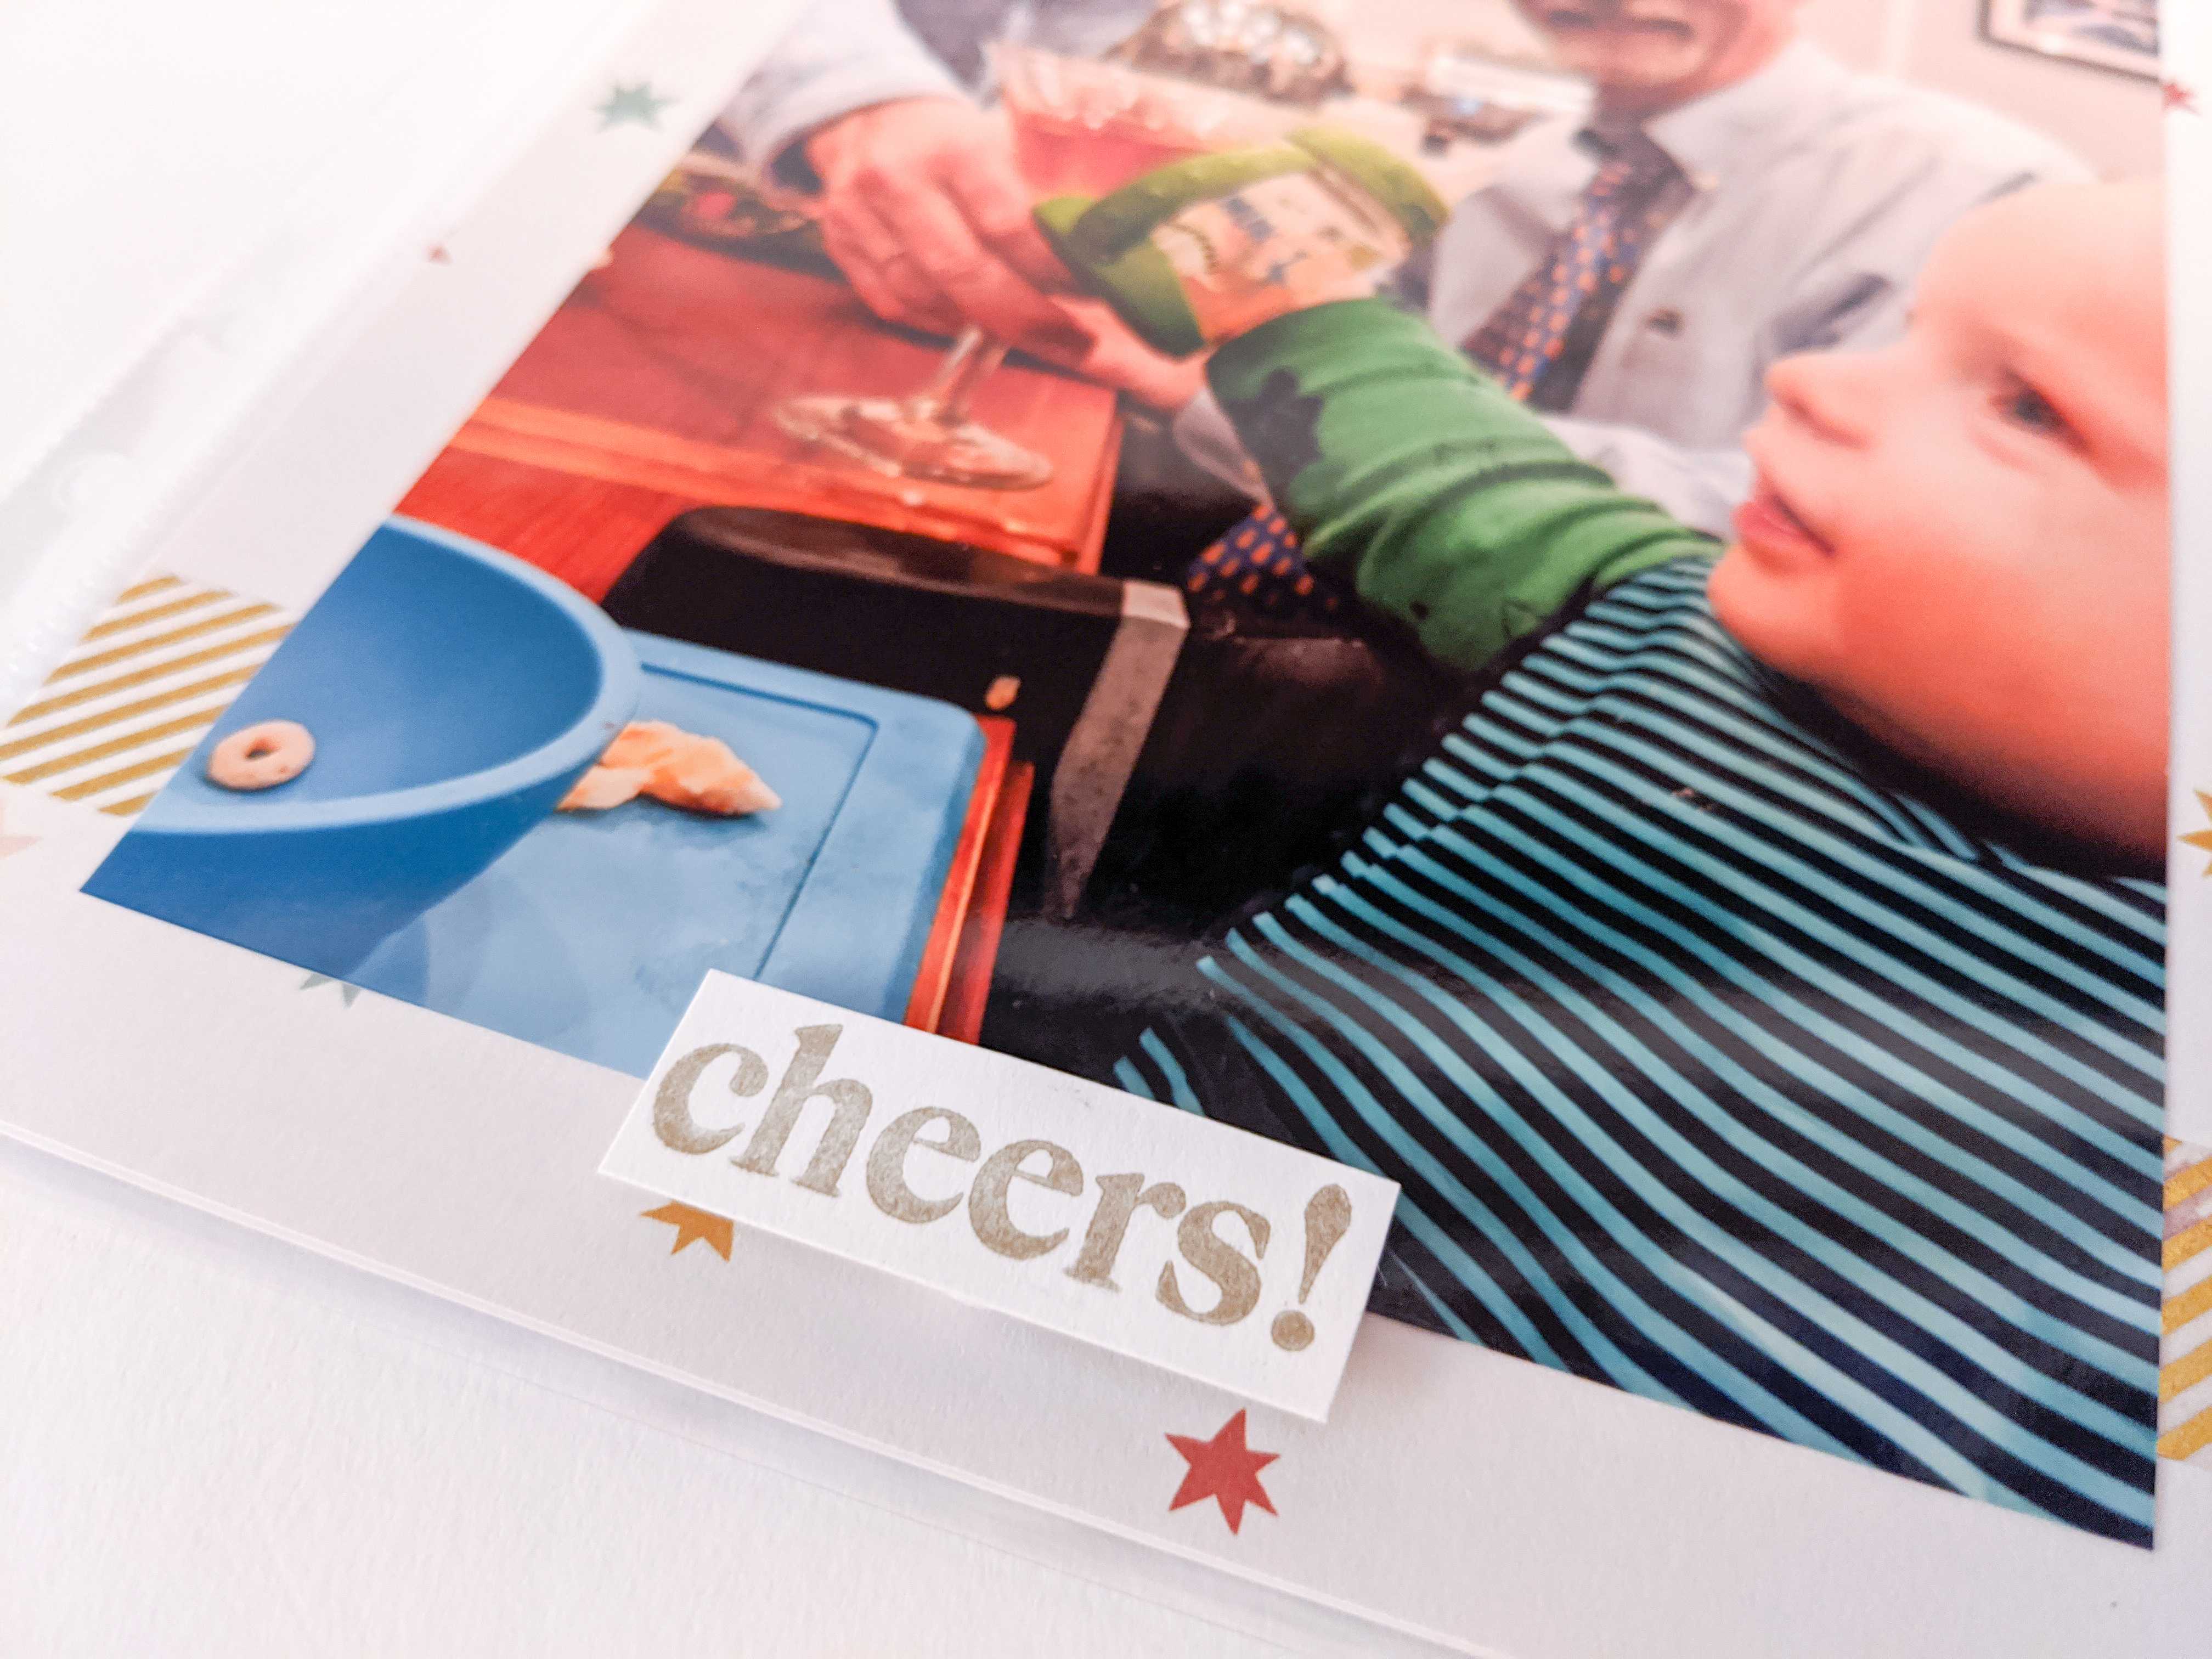
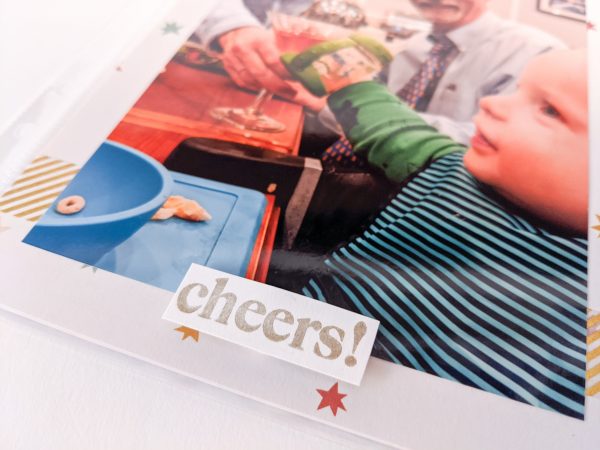
I was so excited to use the 3×4 card featuring baked goods from Feed Your Craft for this layout, and I was happy that the fabric circle matched the colors on the card. For the 6×8 full page layout, I used pattern paper Crate Paper’s Snowflake kit along with a stripe of gold washi to back a 5×7 photo of Henry doing “cheers” with Mom and Charles. I was so thrilled that January’s kit from Ali Edwards included the perfect stamp!

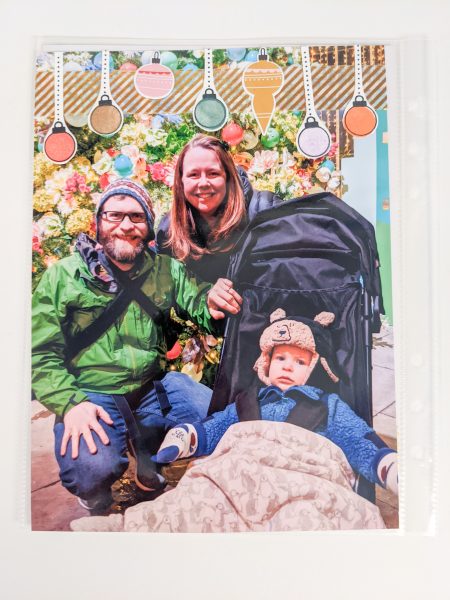
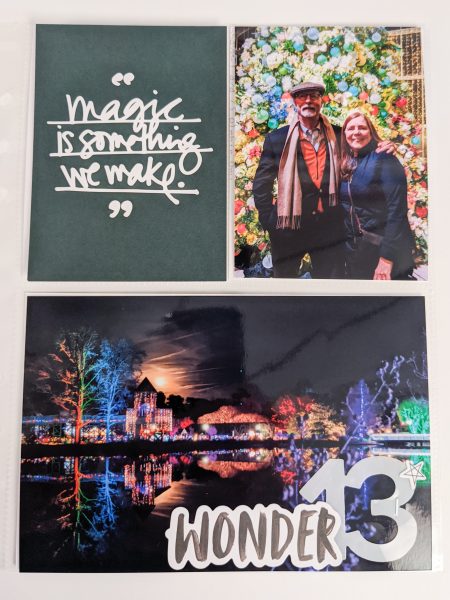
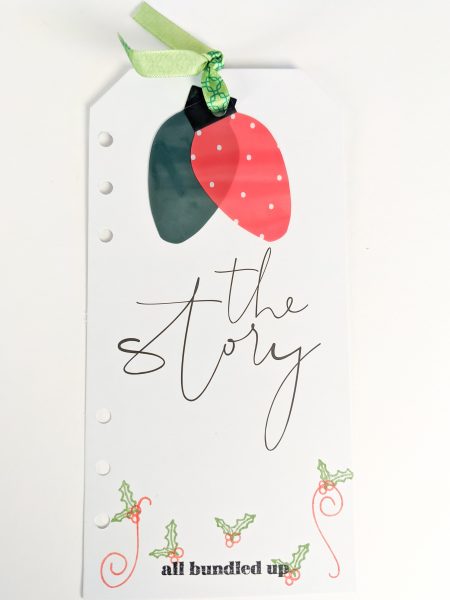
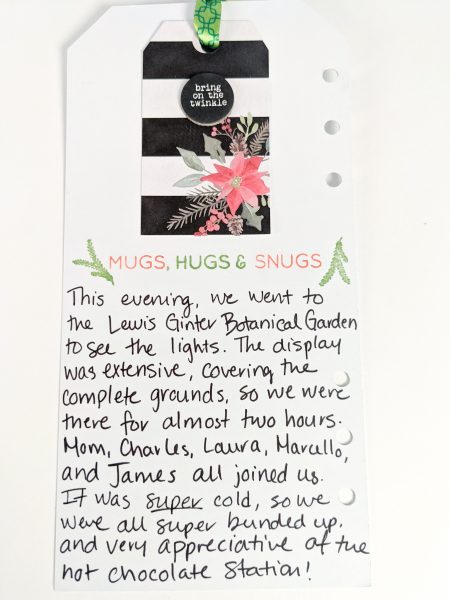
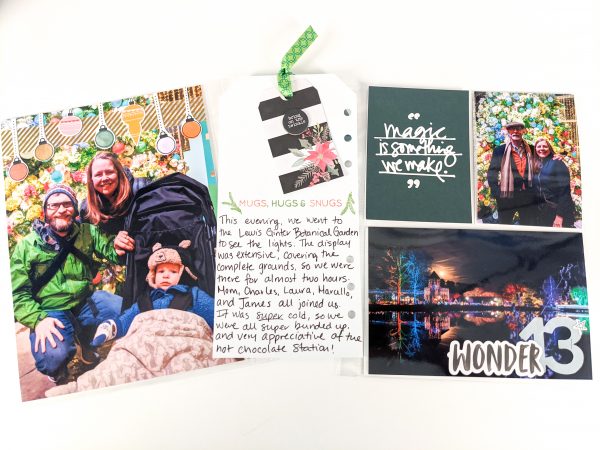
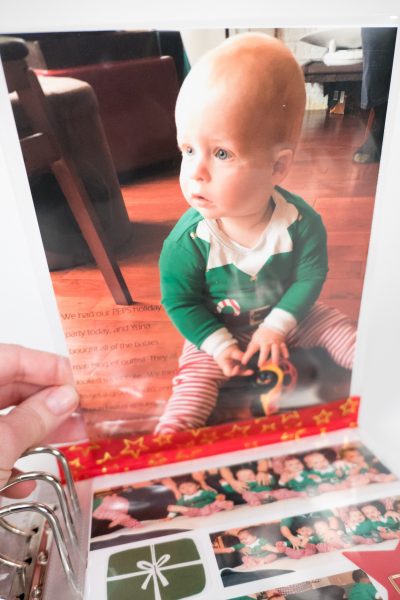
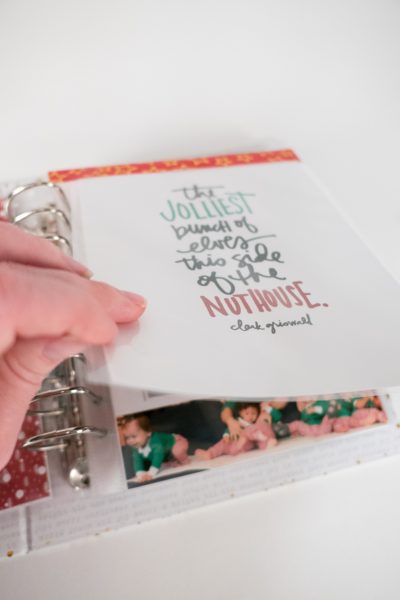
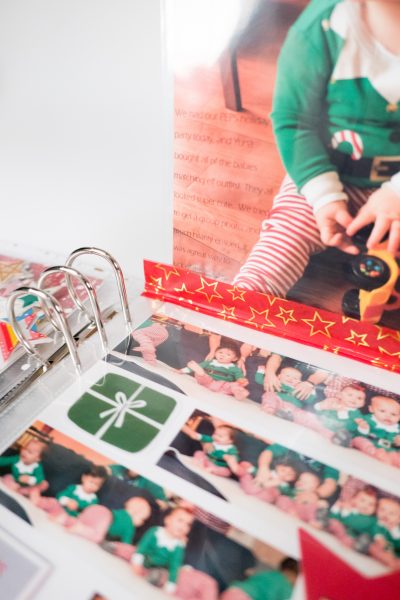
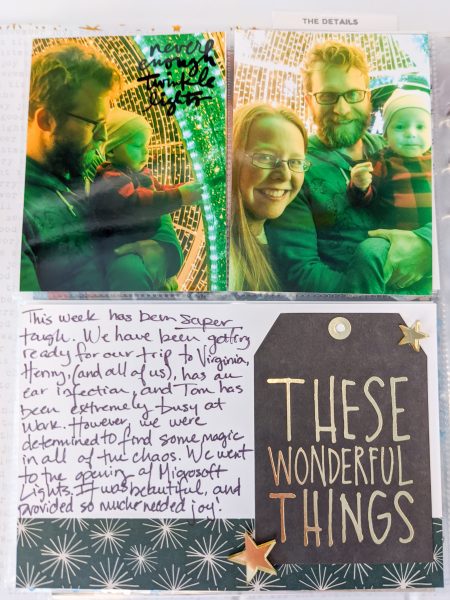
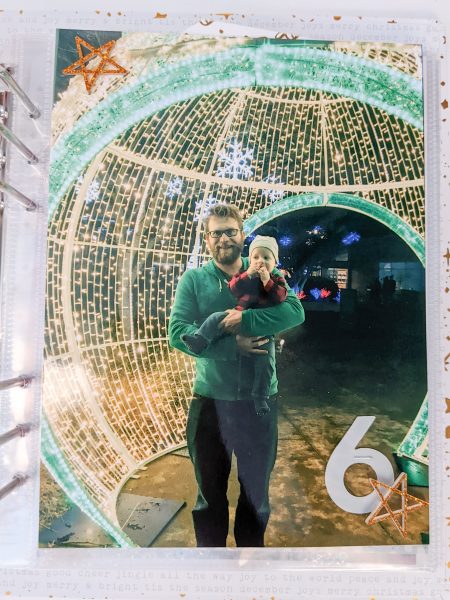
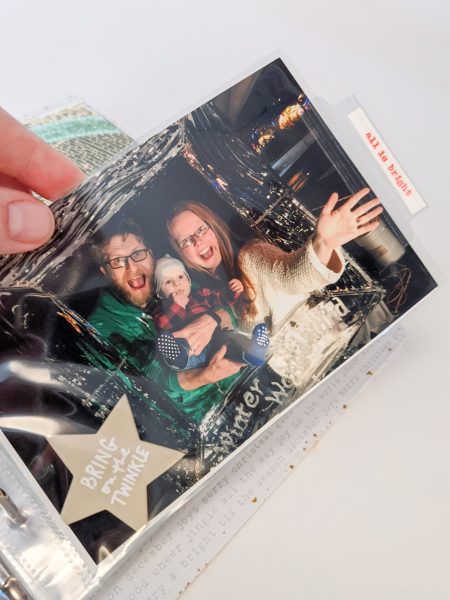
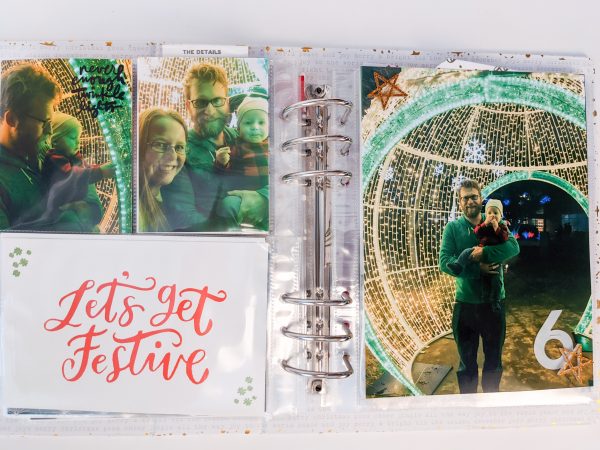
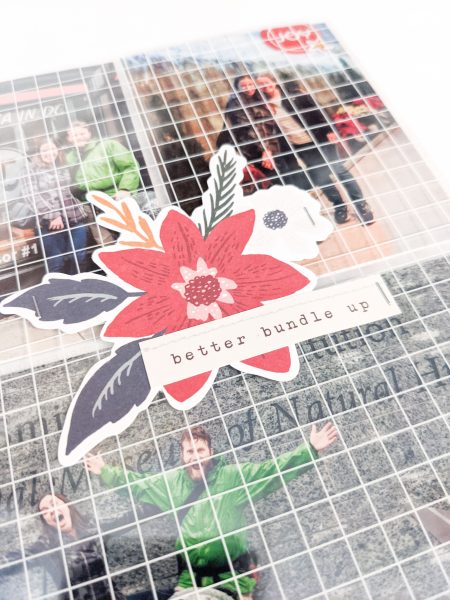
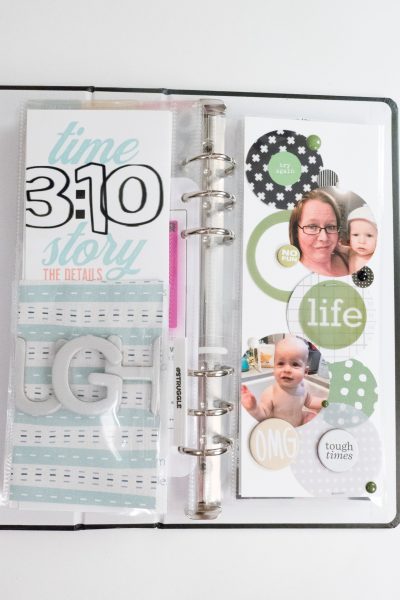
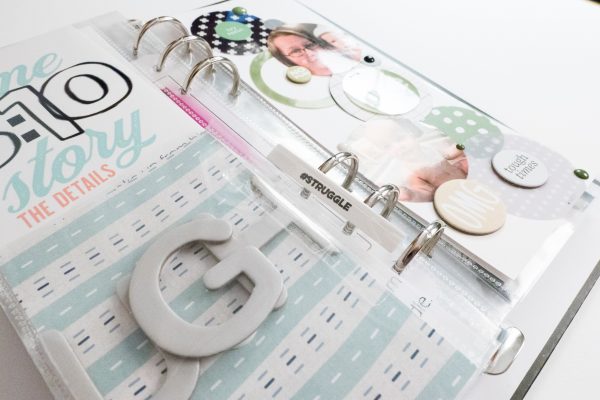
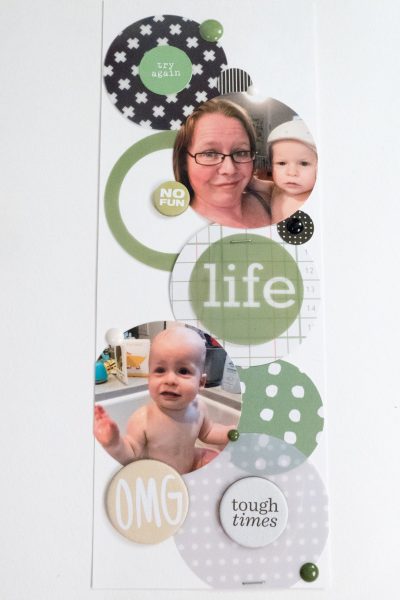
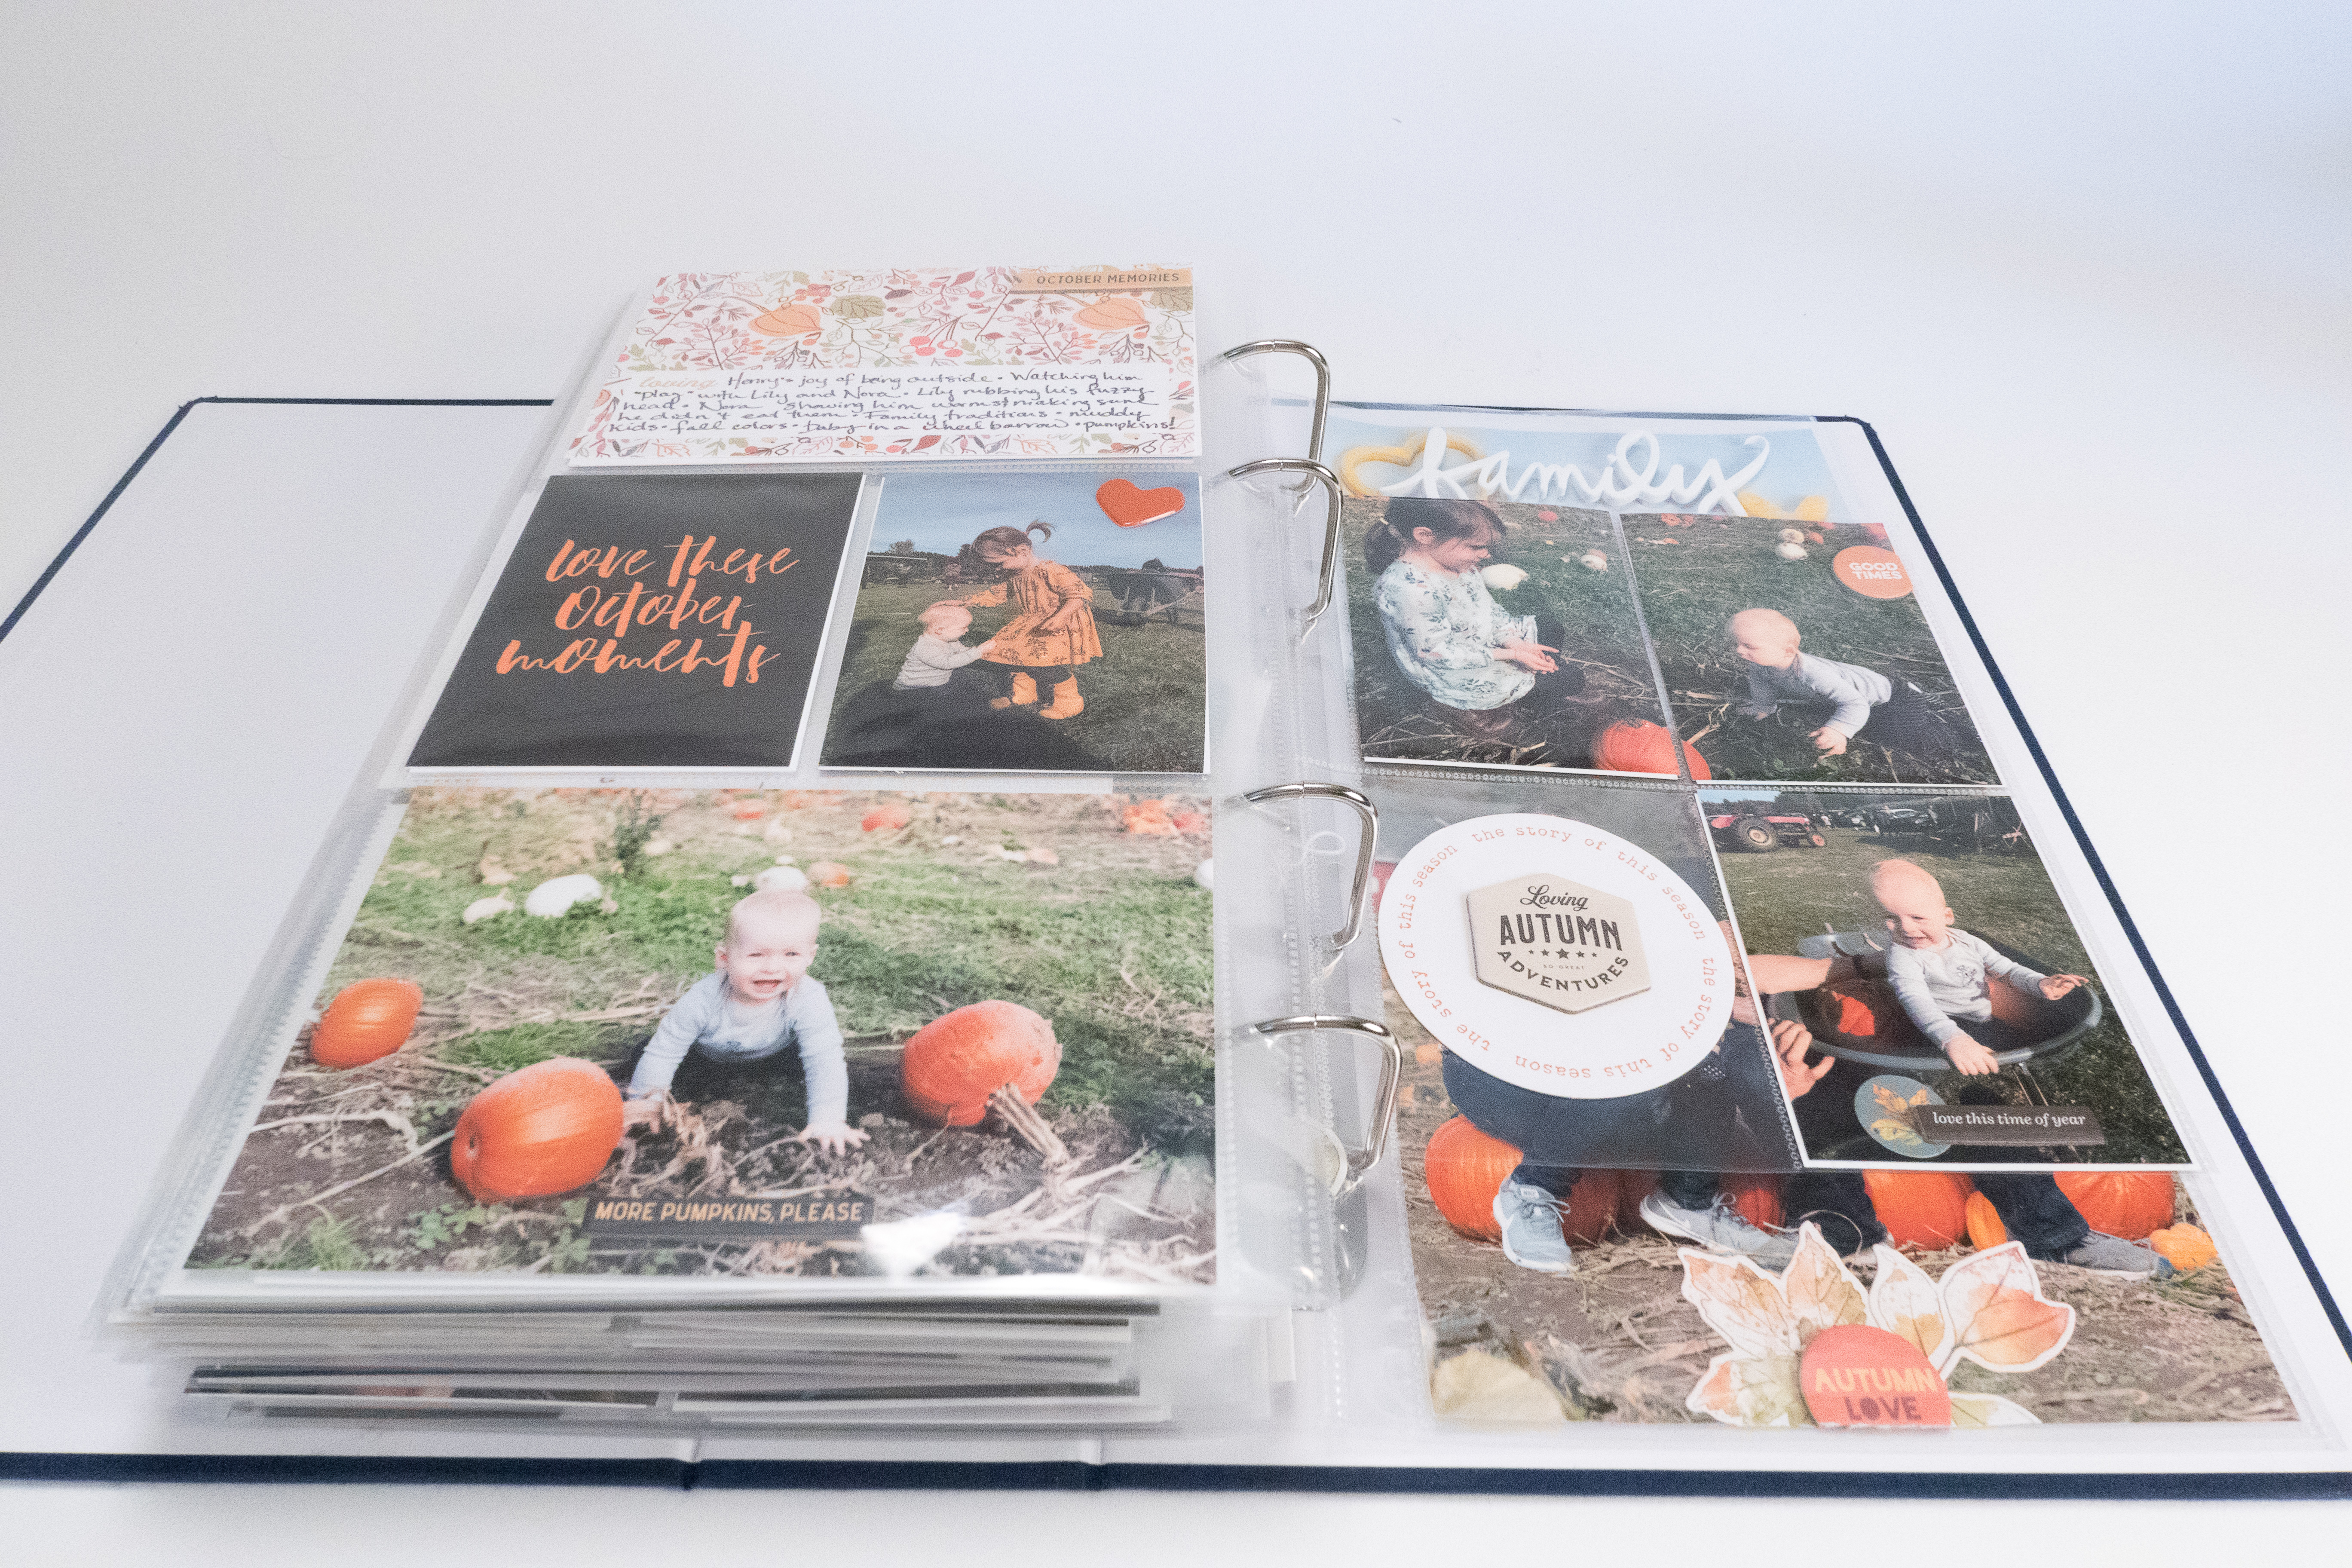
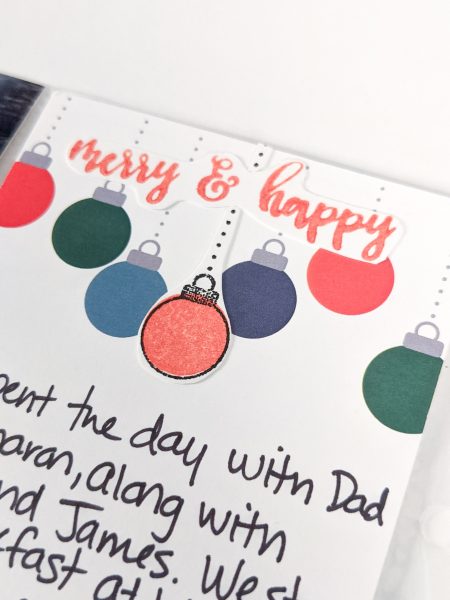
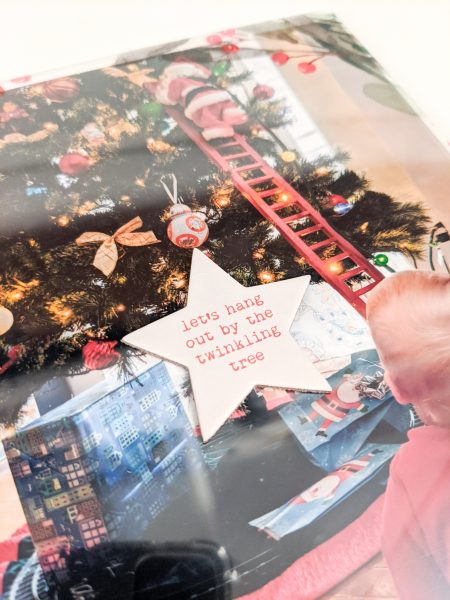
Day 13 is one of my favorite spreads in the album, because I love all the color! The whole family went to the Lewis Ginter Botanical Gardens to see the lights, which were absolutely magnificent. For the full page 6×8 layout, I used the same gold washi from the previous layout for continuity, and used stickers and stamps to create an effect of ornaments hanging down from the top of the page. The ornaments are from Feed Your Craft’s Of the Season kit. This was the first time I have used stamps that layer on top of one another, (the “filling” of the ornament is a different stamp from the outside). It was super nerve wracking to cut these out by hand, but I am really happy with the end result. Again, I used a large shipping tag to hold the journaling, and used ribbon to attach different acetate ribbons to the front and a small poinsettia tag to the back.

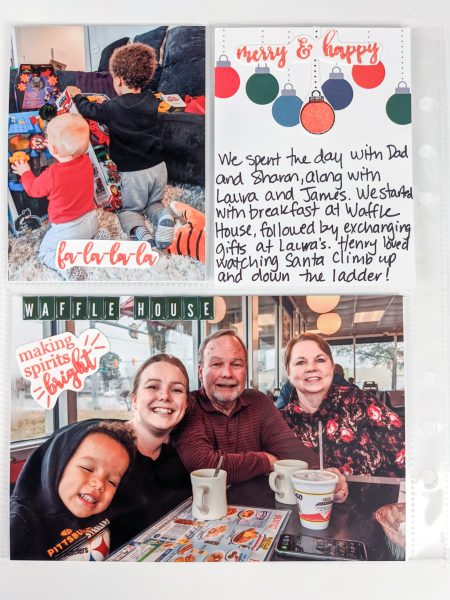
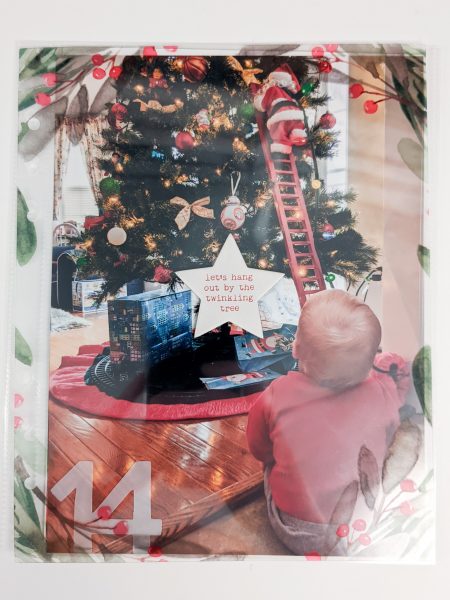
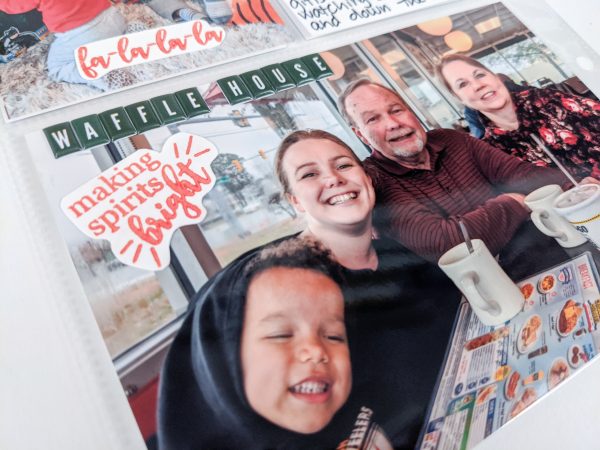
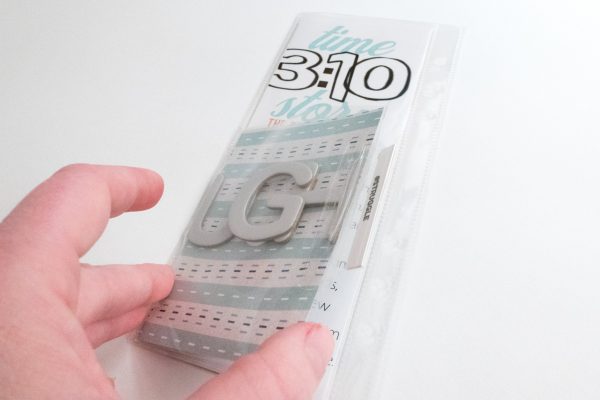
Day 14 is all about our visit with Dad, Sharon, Laura, and James. We went to breakfast together in the morning, and exchanged gifts later that day. I love how the alpha from Feed Your Craft perfectly matches the diner “aesthetic.” of Waffle House. I really love the full page 6×8 photo of Henry watching Santa climb up the ladder, and I didn’t want to detract from it, so I added a simple transparency and piece of chipboard for a simple embellishment.

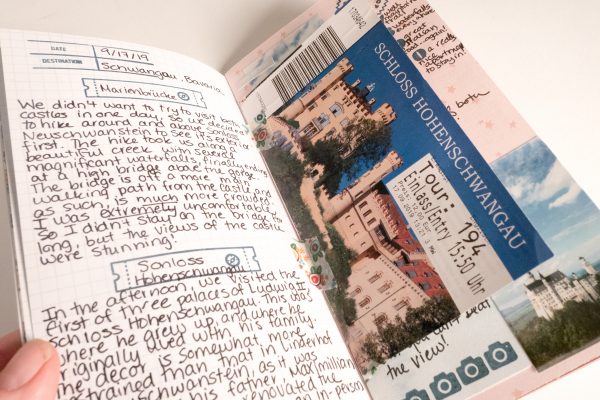
In retrospect, I kind of wish that I had done a small traveler’s notebook for our trip to DC and VA so that I could include more detailed stories than fit in my December Daily album. I am thrilled to have these stories in my album, though, and maybe I’ll try something different another time. Have you tried using a traveler’s notebook as part of your December Daily? How did you like it?

Leave a Comment

December Daily, Days 1-9

My December Daily 2019 album is sooooo close to being done, which makes me one happy scrapbooker. This is my fourth year doing this project, and it remains one of my favorites. As many of you know, the goal of this project is to tell one story, every day, for the first 25 days of December, (though I know some of you go all the way to 31, and I have no idea how you have the stamina…). I love to see our traditions documented year after year, and seeing how our lives change through the lens of the holiday season.

This year, I used a myriad of products in my album including:

I chose to use the 6×8 size this year, as I have done the past two years, since I find that size both small enough to be easily manageable for daily storytelling, and large enough to have space for more “crafty” elements. Completing this project in this size also reminded me of how much I like smaller albums, which I am excited to return to in the new year.

Day one is one of the more crafty pages in my album, and was inspired by the Product Play 3 class offered by Ali Edwards this year. The star wreath took FOREVER to make, but I’m so happy with the way it turned out, and used a lot of products that I had been hoarding for years. It is followed by a fun flip up with loads of pictures, and the journaling for the day.

Day two was a simple story about Henry’s current favorite playground. It has absolutely nothing to do with Christmas, but it captures what we did that day. I like that this simple layout follows the fancier on from the first day.

Day three uses my least favorite pocket page, but one I force myself to use every year anyway so I don’t waste them! This year, I used the front to showcase some of the shows we’ve been watching, and some of the books and podcasts I’ve been listening to lately. The back is dedicated to the wonder that is Baby Yoda, from the TV show, The Mandalorian.

Day four is the hexagon pocket page from the Product Play three class that I made as a foundation page. This was super fun to make, and inspired me to use my fuse tool more. I still plan to print a full page picture to place behind it.

Day five is a simple around-the-house story about how Henry has discovered how to make toys out of just about anything. His current loves are taking the tissues out of the box, and using a serving spoon to bang on a mixing bowl. Gotta love the toddler life. For the journaling on this page, I cut down a larger page protector and used an avery index tab on the top.

On day six we went to see the lights at Microsoft. Tom had been incredibly busy at work that week, and we were desperately trying to get ready for our trip to Virginia, so this was a nice respite. I cut down a page protector to make the 4×6 size, and used a silkscreen card I made as a foundation page to add a bit of an interactive element to this layout.

Day seven was a travel day from Seattle to Washington DC, so the layout is super simple. I went back and added Henry’s ticket into the album for ephemera and visual texture.

Day eight is all about our day in Washington DC. We visited the Museum of African American History and Culture during the day, and in the evening, we walked to see the National Tree. I created the pocket for the museum map using one of the large shipping tags from the December Daily main kit, and attached some star-patterned transparency using washi and my tiny attacher. I then added some pattern paper, chipboard and a photo to the back of the tag to compliment the picture of the tree. I also added a stamp at the bottom to create a triangle effect to the elements on the tag, to echo the triangular shape of the tree on the opposite page.

We spent Day nine with our dear friend, Laura, who braved the horrible weather in DC to go to lunch, and explore the Natural History Museum with us. I used the wreath page to hold three stories from the day, and punched pieces of a map of DC to show where those stories took place. I used the transparency with ephemera to break up the layout a bit. Later that evening we took the train from DC down to Richmond, VA, but it was such a disaster we forgot to take pictures.

I will have more posts about the rest of my album over the next few weeks, but I’m recovering from hand surgery, that’s all my bum paw can take at the moment. Happy Friday!

As an Amazon Associate I earn from qualifying purchases .

Leave a Comment

Apple Picking in 6×12

I love fall. I’m all in for pumpkin spiced everything. I love pumpkin patches, apple cider, sweaters, the whole bit. I know it’s cliche, and maybe even a little bit silly. I don’t care. So when our dear friends Alicia and Kyle asked us if we wanted to go apple picking, I jumped at the chance.

They live about an hour and half north of us, so we met halfway in the Skagit Valley, (one of my favorite places in the state, so I wasn’t hard to convince). We ended up at this adorable orchard and pumpkin patch, which also happened to have a nice farm store as well. I was in Fall heaven. We wandered up and down the rows picking any apples that looked yummy. Henry was a bit confused, but interested in the leaves since he really likes trees. We picked way too many apples, but it didn’t matter. I just made them into apple sauce for Henry once we were home.

For this layout, I used one large 6×12 photo, and the front and back of a 3×3 pocket page so I could include lots of photos. I initially struggled to embellish the 3×3 page, because everything I added made the layout look too busy. Eventually I settled on the little acetate leaves from a recent Ali Edwards kit and some older Ali Edwards sentiment cards, an old card from a Studio Calico kit, and a few pieces from a Simple Stories Fall ephemera kit.

I am making an effort to use the stuff in my stash, and stop hoarding my “special” pieces like that sweet cork pumpkin. It makes me happy to see these unique items actually in my layouts rather that gathering dust in my drawers. I’m trying to remember that there will never be the perfect project for every single item, and done is way better than perfect anyways. How do you use your favorite items?

Leave a Comment

Experimenting with Traveler’s Notebooks.

This year, I’ve been experimenting with traveler’s notebooks (TN), on a few of our longer trips we have taken as a family. Henry is still taking multiple naps during the day, and goes to sleep relatively early, so I knew we would have more downtime that usual on our trips. I thought it would be fun to try the “scrapbooking-on-the-road” approach to fill that time, and to have more up-to-the-minute journaling about where we were and what we were doing.

The first decision I needed to make was figuring out what to bring. First, I picked the container I wanted to use to hold my stuff. For the first trip, I chose one of the zippered bags from Ali Edwards’ Stories By The Month kits. I liked this bag because it, a) had a zipper, and, b) the plastic was heavy enough that my materials wouldn’t get damaged inside. Then,I went through my stash and laid out all of the items I would *like* to take. This included stickers, stamps, adhesive, chipboard, die-cuts, tiny attacher, ink, and more! I then sorted out my “non-negotiable” items, then sorted again, and kept pairing down until everything except my printer fit in my bag. *Update, I added some links for easy reference if you want to do some shopping!*

The main “gear” items I bring are:

  1. Canon Ivy Printer with 3-4 packets of printer stickers.
  2. Folding scissors.
  3. Small ink. I like these tiny ones from Ali Edwards.
  4. Tiny attacher by Tim Holtz.
  5. Pen – I like flair pens, but I also like Ali’s Edwards precision pens as well.
  6. Glue pen.
  7. Washi tape of your choosing.

The printer fits in this handy little holder, which also holds the paper stickers. I chose the Canon Ivy over the HP pocket sprocket after reading loads of reviews saying that the HP printer created prints that were quite dark. I have to say, the prints from the Ivy are also dark, so I correct for that as much as I can in the Canon Ivy app. I like that it holds a charge for several days, connects quickly and easily to my phone, and the print quality is pretty decent for a travel printer.

All of the rest of my gear fits in a small, zipped bag. This one is from Ali Edwards, but I also have ones from Studio Calico. I tend to reuse the bags from subscription kits as they are more durable that a ziplock bag.

I have used traveler’s notebooks for three trips now, and I can say that I honestly enjoy them. I love looking back on my thoughts in the moment, and they give me an excuse to journal every day. It also helps to have a creative outlet while traveling, especially during Henry’s naps. I also enjoy the challenge of using a very constrained collection of materials. It forces me to use what I have, and to be both consistent and creative with my layouts.

This first traveler’s notebook was created during our three-week trip to Australia. I tried to have repeated elements day over day, such as the headings and stamps that I used. I also used washi tape to add ephemera collected along the way.

The next traveler’s notebook I created was for our trip to Europe this fall. I used a slightly different setup, mostly because I wanted a way to safely carry the large shipping tags from Ali Edward’s Travel Collection. This taller envelope fit not only the tags, but the notebook its self, which was nice. My gear setup, (scissors, printer, etc), was all the same. For this notebook, I even got Tom to write in it one day. I really like having his handwriting and voice included in this notebook.

So far, I have really enjoyed working with traveler’s notebooks, and I plan on continuing to use them for future travel.

As an Amazon Associate I earn from qualifying purchases .

Leave a Comment

November Day in the Life

Real talk, friends. My son and husband have been sick on and off for about three weeks now, and today the both got diagnosed with ear infections. I’m behind in laundry. I keep discovering surfaces in my house that are sticky with unknown substances. I’ve eaten way more crappy food than I care to admit simply because it is fast and easy. This is how life is sometimes. Messy. Yucky. Challenging.

In the midst of the mess, was the second “designated” day for the Day in the Life, a project spearheaded by Ali Edwards, where we are challenged to document the details of one day. It’s not a special day. It’s not a holiday. It’s just a day. Right now my life is messy. It’s sticky. It’s filled with snot and coughs and crying. But each day also has moments of joy, and this is the true beauty of this project. The invitation to be present in the mess. To be present in the mundane. To be present in the nitty, gritty, gross, fun, silly, belly-laugh moments of one day.

I haven’t historically liked the creation of these layouts. I have previously found them tedious, and even a little boring. I have been anxious to scrapbook about a big hike, or a recent trip, something fun, something flashy. However, as I have completed a few of these Day in the Life and Week in the Life projects, I have come to a realization. These projects are a gift to my future self. I absolutely LOVE going back to these albums and layouts and looking at the snapshot of what life was like at that specific moment in time. I love to see how things change, and what I was struggling with. I love being reminded of the fact that I was really craving peanut butter and jelly English muffins when I was eight weeks pregnant. I love seeing those boring, mundane details. Because these, truly, are the stuff of real life.

In order to try and make the layouts a little more interesting for me to compete this time, I tried playing with different elements from the recent Product Play 3, and playing with products and processes I’ve been enjoying recently, such as adding dimension, and playing more with my stamps. I chose to complete this project in a hybrid style this year, mostly because I knew that during the first DITL in February, I would have a five month old, and the ease of literally just filling in journaling and popping in photos in Photoshop was the only way this was going to get done. For this November day, I was able to be a bit more crafty, and added elements from the recent Foodie kit, the Baby, Rest, Tough, and Watch Story Kits from Ali Edwards, the amazing Freshly Baked stamp set from Kelly Purkey, and some stickers from both Ali Edwards and Studio Calico. I like that the Hybrid approach allows for so much freedom and flexibility.

One way I added dimension for this project was to use Avery index tabs. Ali talked about finding more space in a smaller album by using folded page protectors to either add or hide journaling, or to add more space for photos. I used this technique on two of my pages for this day.

Another way I added dimension was by using pop dots. These adhesive dots allow for various elements to literally POP off the page. I have really enjoyed using these in my layouts recently, especially to add emphasis to stamps.

Finally, I have stuck with the pledge I made to myself to use my stamps more, and I dug into my stamp box frequently for this project. It has been fun finding just the “right” stamp for any given layout.

All in all, I found this November edition of Day in the Life much more enjoyable than those past. It is still a gift to my future self, and one I will come back to again and again.

Leave a Comment

Experimenting with Monthly Project Life

I wanted to try something a little different in 2019 for my family album. I decided to play along with Ali Edwards and document our family stories on a monthly basis. The weekly version of Project Life always seemed too daunting to me, and I knew I would never be able to keep up, so I was excited to try this approach. It also allowed me to use more of the elements from my Stories by the Month subscription rather than hoarding all the pretty things, so it was pretty much a win all around.

While I love the approach, I wish I had not decided to work on two different sized albums this year, as it only confused and distracted me in editing. That being said, it was fun to work with a different album size for my MPL (Monthly Project Life, duh), and this year, I decided to try the new 6×12 album offered by Studio Calico. I really, really like the large full page photos that can fit in this size, but I do wish they could be a tad wider. I think I may try 9×12 next year because of this.

In August, I took full advantage of the full sized page protectors to document our hike to Lake Ingalls. This is one of my favorite hikes in Washington, specifically for the views of Mount Stewart, so I was excited to use a full page photo for this. I have found that a full sized page pairs nicely with a page protector with 4×6, 3×4 or a combination of the two, so I also included these in this spread.

For one of my October Spreads, I chose to document our trip to the pumpkin patch. This has become a family tradition, (we’ve done it two years in a row…that makes it a tradition, right?), and it was fun to document how much our family has changed over the past year. Last year, Henry was only about 3 weeks old, and had no idea what was going on. This year, he was crawling all over the place and attempting to eat mud and worms. Ah, the joy of toddlerhood.

All in all, I have enjoyed the MPL approach, and I think I will continue it next year, though I have yet to choose a size.

Leave a Comment

Does Size Matter?

For me, the answer is an emphatic YES! In the past three years, I have experimented with no fewer than six different sized albums to hold my stories and pictures. So far, I have used 12×12, 6×12, 8×10, 6×8, 4×6, 3×8, and standard travelers notebook sized, which is just a bit wider than 3×8.

While I have enjoyed all of these different sizes to varying degrees, I can definitely say that I prefer the 6×8 size to all the others. I find it easy to use the pocket pages available in this size, and enjoy doing full size layouts as well. I have used this size for two December Daily albums, one travel album for our trip to Iceland, my son’s albums for his first year, and our family album in 2018. For me, this is the easiest size to just “get it done”.

For our family album this year, I decided to try something different than my standby of 6×8, and ordered the 6×12 from Studio Calico. While I enjoy having the ultrabig photos, I actually have found this size more challenging. I think it’s because it’s too narrow for the height of the full sized photos, (this is also my issue with 3×8, more on that later). I have also struggled with this size due to the challenges both Studio Calico and Ali Edwards have had stocking the various page protectors. Not really their fault, I should have ordered more earlier in the year.

I have a few ongoing albums of various sizes, which is both fun, and challenging at times. This year, not only have I been doing my project life-style family album in 6×12, but I have also been documenting my son’s first year in two 6×8 albums. This was a HUGE mistake. I’ve really struggled all year to tell stories in two different sized albums. I find it distracting to deal with different sizes during editing, and have found myself falling behind even more than usual. I have let my issues with the various sizes of my albums get in the way of getting my stories told. Not good. I look forward to returning to 6×8 for my 2019 December Daily, and for my planned 2020 family album. Though I find myself still tempted by those pretty 9x12s…

As I mentioned earlier, I have also dabbled in 12×12, 3×8 and traveler’s notebooks. My one 12×12 album is UNESCO themed. My husband and I have visited many UNESCO sites around the world in our travels, and I thought it would be cool to have a dedicated album just for these sites. I love the full page photos of these beautiful sites, and have often paired them with pocket pages to tell their stories. I have a handful of 3×8 albums, and while initially I struggled with the size, I really enjoy the end product, especially for projects like Day in the Life and Week in the life. Finally, I have been playing around with traveler’s notebooks to scrapbook our adventures while we are on the road. These have become much more a travel journal than a scrapbook, but are still fun. I plan to write more about these later.

What kinds of albums do you gravitate towards? Do you have a size you just don’t like, or a particular favorite?

Leave a Comment