Skip to content

My Little Corner Posts

Summer Lovin’

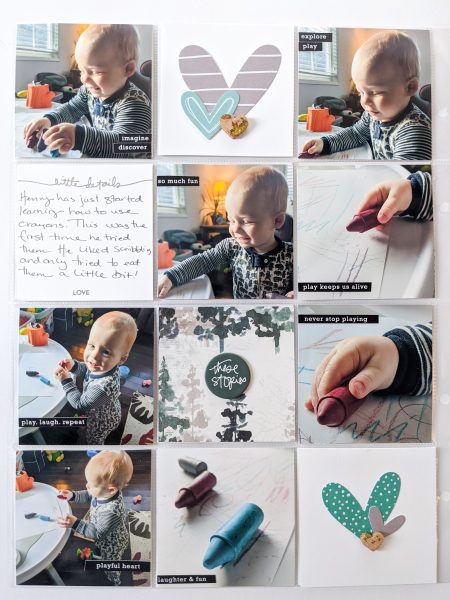
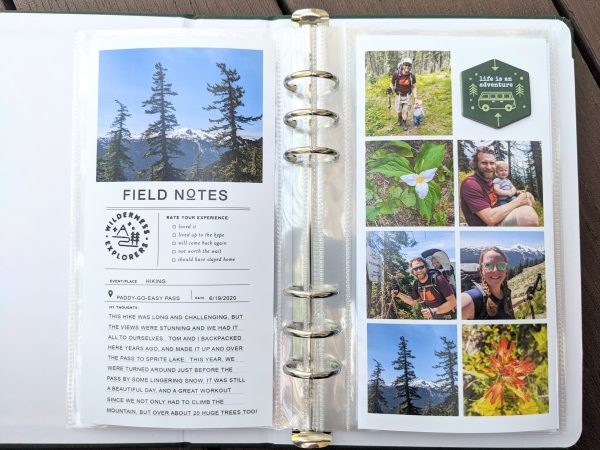
One positive thing that came out of our Summer of Quarantine was that we got to spend a lot of time hiking and camping. Tom and I have always loved to hike together, and it has been fun introducing Henry to our favorite spots and exploring new places together. It hasn’t always been easy, (Henry is heavy and can’t walk very far, sleeping in a tent is very different than sleeping in his crib at home), but it has been worth it. Now that Fall is in full swing around here, and the days are getting shorter and wetter here in the Pacific Northwest, it was been fun to revisit some of our summer trips by making a few layouts in our family Monthly Project Life album.

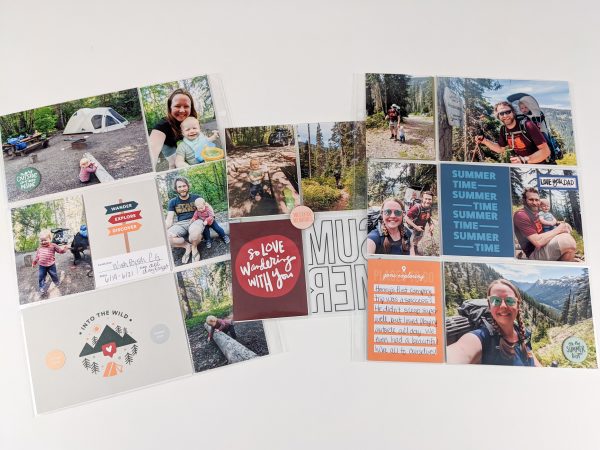
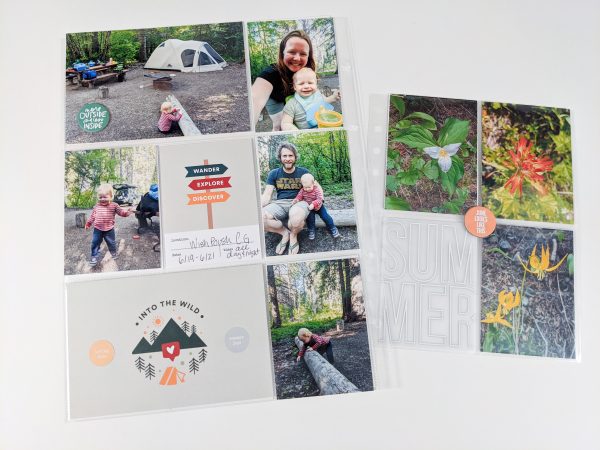
It has become a tradition to go hiking as a family for Father’s Day, and this year was no exception. We went out to the Teanaway and hiked up Paddy-Go-Easy pass in an attempt to reach Sprite Lake. We got turned around by snow just before the pass, but we got a good workout all the same. This was Henry’s first camping trip, and let’s just say it wasn’t exactly smooth sailing. We have since found creative ways to help him, and us, get more sleep.

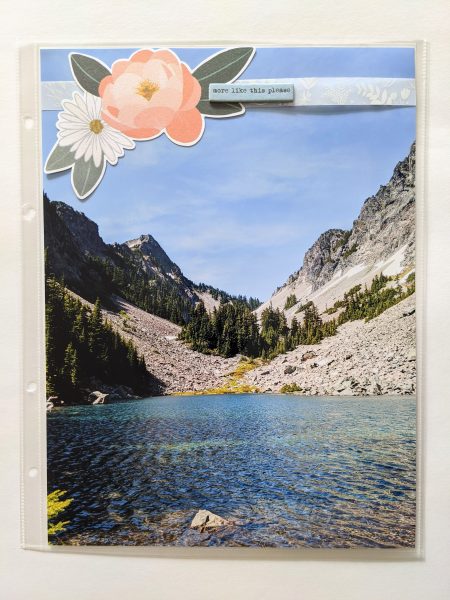
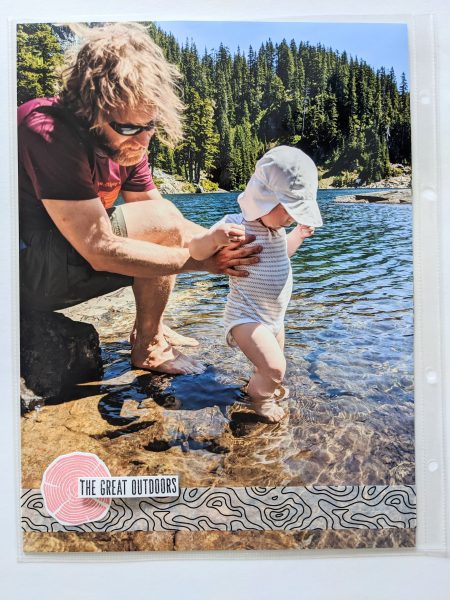
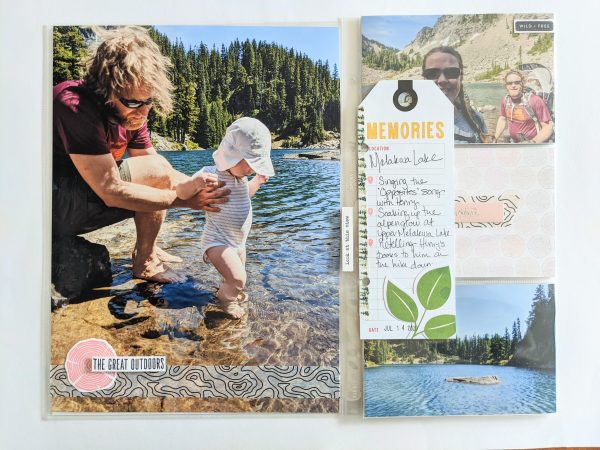
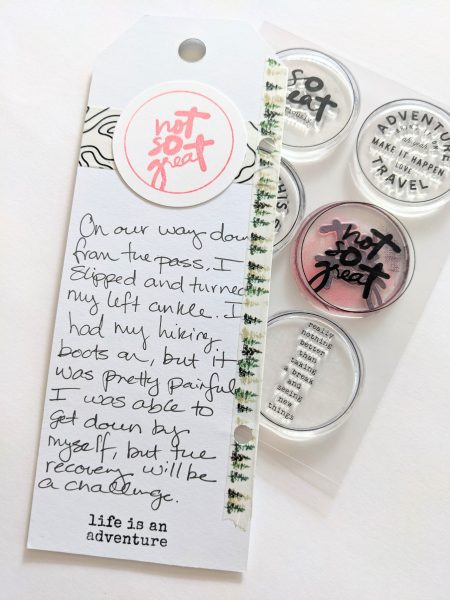
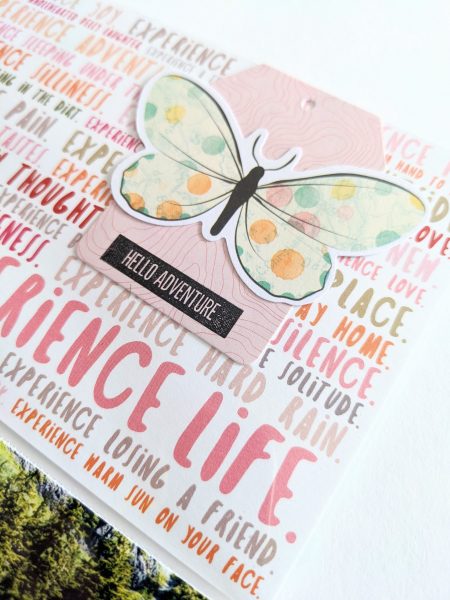
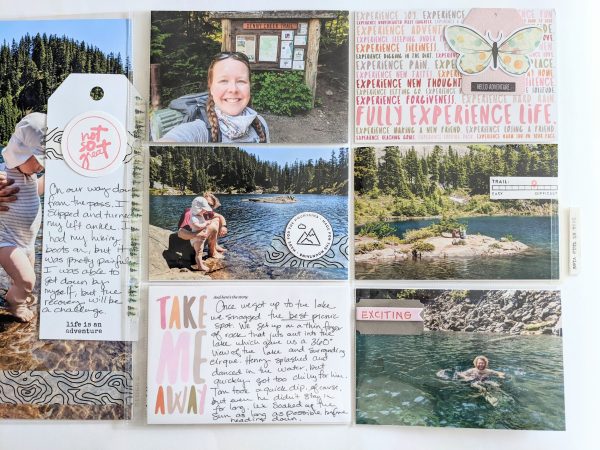
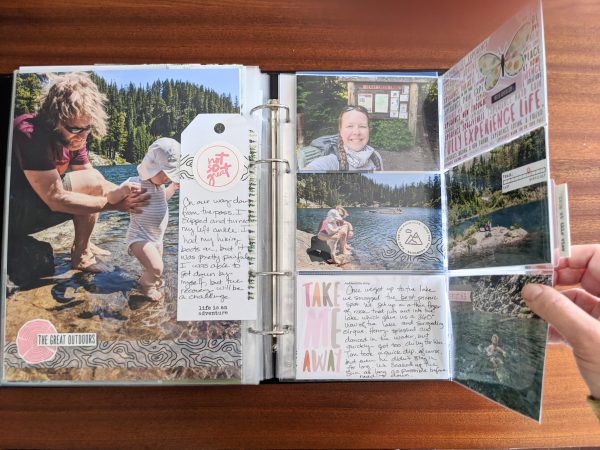
One of our favorite local hikes is to Melakwa Lake in the Alpine Lakes Wilderness. This hike clocks in at about 10 miles round trip, and leads to two beautiful lakes: Melakwa Lake and the uniquely named Upper Melakwa Lake. We were lucky enough to snag a prime picnic spot to soak in the late afternoon sun. Tom took his habitual swim, and Henry and I dipped our toes in the icy water. Unfortunately, I rolled my ankle on the way down, which is still healing.

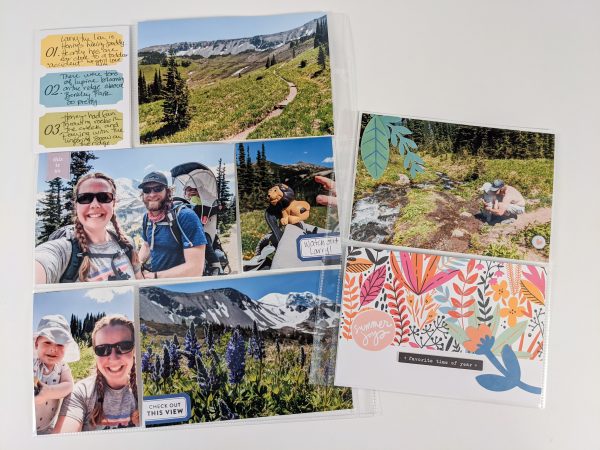
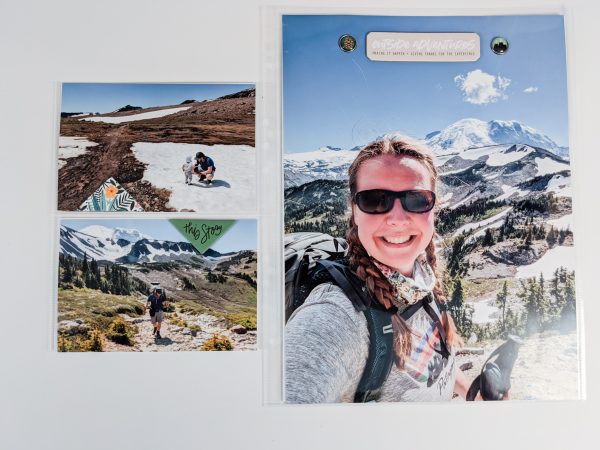
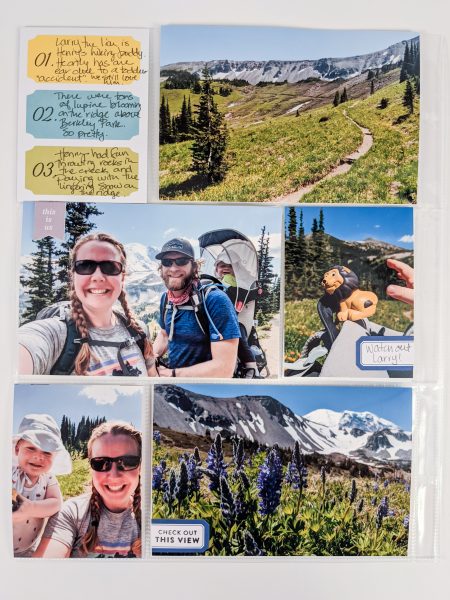
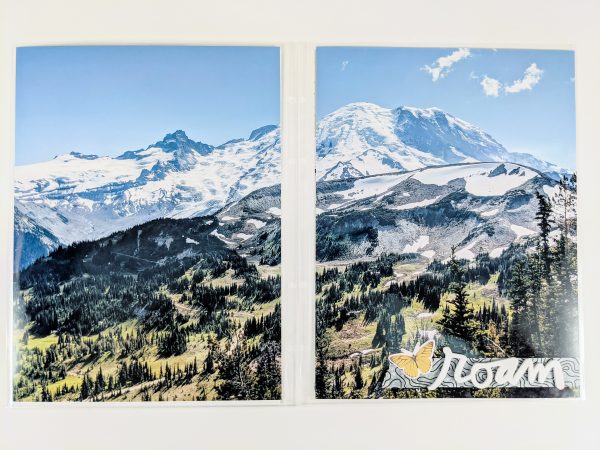
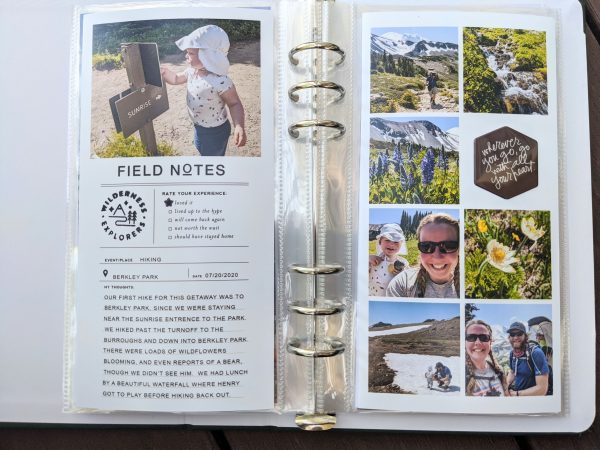
We are super lucky that we live within driving distance of the three National Parks here in Washington, and we traveled to Mount Rainier National Park twice this summer for camping and hiking trips. On our first trip, we stayed at the beautiful Silver Springs Campground, and hiked to Berkley Park and Naches Peak Loop. Henry loved that our campsite had a stream running through it, and would have happily stood beside it all day throwing little pebbles and leaves, and watching them splash.

I’m still in the process of making a layouts for some of our other hikes this summer, including our second trip to Mount Rainier, so stay tuned!

Leave a Comment

What Size Is That?

I love experimenting with size in my scrapbooks. I enjoy the challenge of using both different sized albums as well as different sized page protectors. As my scrapbooking style has developed, I have enjoyed playing around with using multiple different sized page protectors, photos and ephemera in my albums.

My December Daily albums are usually my most “crafty” albums of the year, and are often a place I used to try out new ideas for layouts. In my 2019 I experimented with size more than I ever, and had a lot of fun with it. I used a 6×8 album, but also played around liberally with 3×8 shipping-style tags, using cards outside the page protectors, and creating my own pockets to hold ephemera. I like that they added a lot of visual interest without adding much bulk, which is often a problem I have with this project!

This year, I’ve been doing Monthly Project Life for our family album. I’m loving the ease, and the variety of page protector size of the 9×12 album. It is a very simple size for both quick, pocket layout, and more crafty, detailed spreads. Another thing I’m loving about this size, is the ability to include different size page protectors such as 6×8 and 8×10. I like the way that different sized page protectors look when they are layered on top of each other within a spread. I think it adds interesting visual texture, (and it allows me to stuff in even more photos).

Sometimes its fun to experiment with size outside the page protectors as well. This is not a technique I employ much, mostly because I’m worried that little hands will damage things outside of the page protectors, but it is still fun to play around with from time to time. In this year’s Week in the Life, I did a spread that layered a 3×4 journal card, on top of a 5 1/2 x 8 1/2 watercolor painting on top of a traditional 3×4 page protector. I really like how the different papers and plastics have different textures. I also added a repeated element of the geotag half circle outside the page protector in my 3×8 Europe travel album which I used to hold the names of different locations that we visited.

I enjoy the look of my albums more when I switch up the sizes of pictures and page protectors that I use. Do you use pictures or other elements outside the pockets? Do you switch up the size of your page protectors in your albums? I’d love to hear what you think!

Leave a Comment

Losing My Mojo…and Finding it Again

2020 has been anything but normal. Between the pandemic, civil unrest, injuries, losses, and the ups and downs of having a toddler, there have been many many challenges to contend with. And somewhere along the way, I seem to have lost my scrapbooking mojo. I managed to complete February and March in my monthly project life… and then…nothing. I took pictures and wrote most of the words for Week in the Life, but it felt like a chore. Our life has felt like Groundhog Day for months, and I just couldn’t find the motivation to tell stories.

However, I was not stagnant. At least not for long. I learned how to sew so that I could make masks for my family and friends. Then, I thought, if I could learn to sew masks, I could sew curtains, and placemats, and soon I’m going to start my first quilt.

I started a watercolor subscription with Let’s Make Art, and have found joy and calm in painting. I have started branching out into more detailed tutorials with Anna Mason’s online school, and even tried my hand at original paintings based on flowers we see on our daily walks.

Recently, my friend Ingunn, a fellow scrapbooker, told me about how she decided to make a dedicated “pandemic summer” album, just dedicated to the awesome things she and her family were doing locally. This spoke to me in a way that project life had not. I wanted to tell the stories of our hikes and small adventures like Henry’s first camping trip. I didn’t want to put a lot of pressure on myself to make a perfect album, and I wanted something that felt do-able and reasonably easy and quick.

I found some layered templates designed by Liz Tamanaha over at Paislee Press which fit perfectly into a Citrus Twist Life Crafted album and just started plunking in pictures and short journaling. I added simple embellishments from Ali Edwards’ Roam kit. The final outcome is clean and simple, and I’m really happy with how it looks.

The best part about working on this album, is it has gotten me excited to tell stories again. Just today I uploaded photos from May and June to be printed at Costco! I’m hoping my project life slump is coming to an end and I’ll be able to share some of the new layouts soon!

Leave a Comment

January Project Life

I had a lot of success with keeping up with my monthly project life album last year, and I am excited to continue with it this year! I decided to change the size from 6×12 to 9×12, which I am optimistic about. I made the switch for two reasons: I like the variety of pocket page sizes, and I like the width of the full page photos better. Because only two online stores that I know of carry this size album and page protector, (and last year there were supply issues), I really stocked up on my page protectors, and will hopefully make it through the year without having to reorder. Much. Finger’s Crossed.

I’m not making or enforcing a lot of rules on myself for this project, other than to document what happens in our family’s life each month throughout the year. This might mean one layout for the month or seven. I’m looking at you July hiking pages. This month, kind of to my surprise, holds five simple layouts, though one is the album introduction page, so that one doesn’t really count, right? These layouts are not really “crafty” AT ALL, because I’ve been recovering from hand surgery, but done is better than perfect.

Earlier in the month, we had several days of snow. We only get a few days of snow a year, if we’re lucky, so it’s always exciting. I was super excited to use this stamp set from Elle’s Studio that I had ordered before the holidays in a fit of optimistic glee that we would actually get snow this year. I love how the snowflake stamps can be used to build patterns, and how well the other stamps worked together to help tell our snowy story.

This next layout is all about my surgery and the beginning of my recovery. I have been making an effort to go back through my stash each month and use all the “special” pieces I’ve been hoarding forever. This month, it was the wooden words, and the acetate “just breathe” card.

Another goal I have for this year is to use more of the elements from my Stories by the Month subscription from Ali Edwards. I’m finding the page protectors in the 9×12 size are really helping with this, and allow a meaningful, simple layout like this to come together quickly. I hope to include a page similar to this each month to hold multiple, smaller stories from the month as a whole.

Speaking of holding multiple stories, I also hope to include a “Henry Updates” layout each month, if possible. Last year, I had a separate 6×8 album for Henry that documented his first year. While I’m super glad I have this album, I found it cumbersome to keep up with two albums in two sizes each month. I felt like I was repeating myself constantly, and struggled to deal with different sizes when I was ordering prints. It’s a huge relief to have one album hold all of our stories for the year.

That being said, I still want to remember as many of the little details as I can of Henry’s childhood, so layouts like this are helpful. I was inspired by the incredibly talented Laura Wonsik, who does a great job of always including collections of little stories about her girls in her layouts. I feel like this page protector lends its self perfectly to this kind of layout.

I’m excited to continue my 9×12 montly project life into February!

Leave a Comment

New Album – All About Books!

New year, new album! For a while, I’ve wanted to document what I read throughout the year, and I have finally decided to pull the trigger. I chose the Life Crafted Album from Citrus Twist Kits, because it seemed like an approachable size: not too big, not too small.

The first layout I did for this album is about Jenny Colgan’s Little Beach Street Bakery series. These funny and sweet books set in on an island off of Cornwall in the UK, had been a fluffy, wonderful distraction while I’ve been recovering from hand surgery.

I loved how quickly this layout came together, even though I’m still getting used to the new size. The stamps come from Ali Edwards’ Read kit, and from Kellie Purkey’s Freshly Baked set. I wanted to be thoughtful about the stamps I used for journaling, because I want to use them throughout the album as I create new layouts. I’m excited about this album, and am looking forward to documenting what I read throughout the year!

This post contains affiliate links.

Leave a Comment

December Daily Days 10-14

This chunk of my album is dedicated to the time we spent visiting our family and friends in Richmond, Virginia. It was a very busy trip, but it was wonderful to get to spend time with people who are so special to us. We even got to have several different “Christmases” with various family groupings, which Henry was particularly excited about.

In my last post, I created a complete list of the products and kits I used for my album, so if you are interested in that, you can check it out here.

Day 10 was our first full day in Richmond, and we mostly spent it with Tom’s Dad and step-mom. For this layout I paired three 3×4 photos with one 3×4 card embellished with a cardinal on a pop dot. We were in Virginia after all. I also used another one of the large shipping tags from Ali Edwards’ main kit to hold my journaling. I used ribbon to attach two acetate ornaments to the top, and the number fit perfectly into the top ornament. I like how they move freely as the tag turns in the album.

Day 11 was a quiet day at home, for the most part. My best friend, Eva, came over with her youngest little girl to play for the day. Laura and Marcello also joined us. The weather was beautiful, so we spent most of the time outside. I used the back of the large shipping tag to hold a photo, which paired nicely with a 3×4 pocket page. I like the continuity of having the large shipping tags through out the album.

Day 12 was a combination two things we did that day, mostly because I wanted to include that sweet picture of Henry at dinner, and it’s my album, so I make the rules! The main story of the day, however, was how Mom treated Laura and I to a cooking class as one of our Christmas presents. We learned how to make French macarons, which were really quite tricky.

I was so excited to use the 3×4 card featuring baked goods from Feed Your Craft for this layout, and I was happy that the fabric circle matched the colors on the card. For the 6×8 full page layout, I used pattern paper Crate Paper’s Snowflake kit along with a stripe of gold washi to back a 5×7 photo of Henry doing “cheers” with Mom and Charles. I was so thrilled that January’s kit from Ali Edwards included the perfect stamp!

Day 13 is one of my favorite spreads in the album, because I love all the color! The whole family went to the Lewis Ginter Botanical Gardens to see the lights, which were absolutely magnificent. For the full page 6×8 layout, I used the same gold washi from the previous layout for continuity, and used stickers and stamps to create an effect of ornaments hanging down from the top of the page. The ornaments are from Feed Your Craft’s Of the Season kit. This was the first time I have used stamps that layer on top of one another, (the “filling” of the ornament is a different stamp from the outside). It was super nerve wracking to cut these out by hand, but I am really happy with the end result. Again, I used a large shipping tag to hold the journaling, and used ribbon to attach different acetate ribbons to the front and a small poinsettia tag to the back.

Day 14 is all about our visit with Dad, Sharon, Laura, and James. We went to breakfast together in the morning, and exchanged gifts later that day. I love how the alpha from Feed Your Craft perfectly matches the diner “aesthetic.” of Waffle House. I really love the full page 6×8 photo of Henry watching Santa climb up the ladder, and I didn’t want to detract from it, so I added a simple transparency and piece of chipboard for a simple embellishment.

In retrospect, I kind of wish that I had done a small traveler’s notebook for our trip to DC and VA so that I could include more detailed stories than fit in my December Daily album. I am thrilled to have these stories in my album, though, and maybe I’ll try something different another time. Have you tried using a traveler’s notebook as part of your December Daily? How did you like it?

Leave a Comment

December Daily, Days 1-9

My December Daily 2019 album is sooooo close to being done, which makes me one happy scrapbooker. This is my fourth year doing this project, and it remains one of my favorites. As many of you know, the goal of this project is to tell one story, every day, for the first 25 days of December, (though I know some of you go all the way to 31, and I have no idea how you have the stamina…). I love to see our traditions documented year after year, and seeing how our lives change through the lens of the holiday season.

This year, I used a myriad of products in my album including:

I chose to use the 6×8 size this year, as I have done the past two years, since I find that size both small enough to be easily manageable for daily storytelling, and large enough to have space for more “crafty” elements. Completing this project in this size also reminded me of how much I like smaller albums, which I am excited to return to in the new year.

Day one is one of the more crafty pages in my album, and was inspired by the Product Play 3 class offered by Ali Edwards this year. The star wreath took FOREVER to make, but I’m so happy with the way it turned out, and used a lot of products that I had been hoarding for years. It is followed by a fun flip up with loads of pictures, and the journaling for the day.

Day two was a simple story about Henry’s current favorite playground. It has absolutely nothing to do with Christmas, but it captures what we did that day. I like that this simple layout follows the fancier on from the first day.

Day three uses my least favorite pocket page, but one I force myself to use every year anyway so I don’t waste them! This year, I used the front to showcase some of the shows we’ve been watching, and some of the books and podcasts I’ve been listening to lately. The back is dedicated to the wonder that is Baby Yoda, from the TV show, The Mandalorian.

Day four is the hexagon pocket page from the Product Play three class that I made as a foundation page. This was super fun to make, and inspired me to use my fuse tool more. I still plan to print a full page picture to place behind it.

Day five is a simple around-the-house story about how Henry has discovered how to make toys out of just about anything. His current loves are taking the tissues out of the box, and using a serving spoon to bang on a mixing bowl. Gotta love the toddler life. For the journaling on this page, I cut down a larger page protector and used an avery index tab on the top.

On day six we went to see the lights at Microsoft. Tom had been incredibly busy at work that week, and we were desperately trying to get ready for our trip to Virginia, so this was a nice respite. I cut down a page protector to make the 4×6 size, and used a silkscreen card I made as a foundation page to add a bit of an interactive element to this layout.

Day seven was a travel day from Seattle to Washington DC, so the layout is super simple. I went back and added Henry’s ticket into the album for ephemera and visual texture.

Day eight is all about our day in Washington DC. We visited the Museum of African American History and Culture during the day, and in the evening, we walked to see the National Tree. I created the pocket for the museum map using one of the large shipping tags from the December Daily main kit, and attached some star-patterned transparency using washi and my tiny attacher. I then added some pattern paper, chipboard and a photo to the back of the tag to compliment the picture of the tree. I also added a stamp at the bottom to create a triangle effect to the elements on the tag, to echo the triangular shape of the tree on the opposite page.

We spent Day nine with our dear friend, Laura, who braved the horrible weather in DC to go to lunch, and explore the Natural History Museum with us. I used the wreath page to hold three stories from the day, and punched pieces of a map of DC to show where those stories took place. I used the transparency with ephemera to break up the layout a bit. Later that evening we took the train from DC down to Richmond, VA, but it was such a disaster we forgot to take pictures.

I will have more posts about the rest of my album over the next few weeks, but I’m recovering from hand surgery, that’s all my bum paw can take at the moment. Happy Friday!

As an Amazon Associate I earn from qualifying purchases .

Leave a Comment

Apple Picking in 6×12

I love fall. I’m all in for pumpkin spiced everything. I love pumpkin patches, apple cider, sweaters, the whole bit. I know it’s cliche, and maybe even a little bit silly. I don’t care. So when our dear friends Alicia and Kyle asked us if we wanted to go apple picking, I jumped at the chance.

They live about an hour and half north of us, so we met halfway in the Skagit Valley, (one of my favorite places in the state, so I wasn’t hard to convince). We ended up at this adorable orchard and pumpkin patch, which also happened to have a nice farm store as well. I was in Fall heaven. We wandered up and down the rows picking any apples that looked yummy. Henry was a bit confused, but interested in the leaves since he really likes trees. We picked way too many apples, but it didn’t matter. I just made them into apple sauce for Henry once we were home.

For this layout, I used one large 6×12 photo, and the front and back of a 3×3 pocket page so I could include lots of photos. I initially struggled to embellish the 3×3 page, because everything I added made the layout look too busy. Eventually I settled on the little acetate leaves from a recent Ali Edwards kit and some older Ali Edwards sentiment cards, an old card from a Studio Calico kit, and a few pieces from a Simple Stories Fall ephemera kit.

I am making an effort to use the stuff in my stash, and stop hoarding my “special” pieces like that sweet cork pumpkin. It makes me happy to see these unique items actually in my layouts rather that gathering dust in my drawers. I’m trying to remember that there will never be the perfect project for every single item, and done is way better than perfect anyways. How do you use your favorite items?

Leave a Comment

Experimenting with Traveler’s Notebooks.

This year, I’ve been experimenting with traveler’s notebooks (TN), on a few of our longer trips we have taken as a family. Henry is still taking multiple naps during the day, and goes to sleep relatively early, so I knew we would have more downtime that usual on our trips. I thought it would be fun to try the “scrapbooking-on-the-road” approach to fill that time, and to have more up-to-the-minute journaling about where we were and what we were doing.

The first decision I needed to make was figuring out what to bring. First, I picked the container I wanted to use to hold my stuff. For the first trip, I chose one of the zippered bags from Ali Edwards’ Stories By The Month kits. I liked this bag because it, a) had a zipper, and, b) the plastic was heavy enough that my materials wouldn’t get damaged inside. Then,I went through my stash and laid out all of the items I would *like* to take. This included stickers, stamps, adhesive, chipboard, die-cuts, tiny attacher, ink, and more! I then sorted out my “non-negotiable” items, then sorted again, and kept pairing down until everything except my printer fit in my bag. *Update, I added some links for easy reference if you want to do some shopping!*

The main “gear” items I bring are:

  1. Canon Ivy Printer with 3-4 packets of printer stickers.
  2. Folding scissors.
  3. Small ink. I like these tiny ones from Ali Edwards.
  4. Tiny attacher by Tim Holtz.
  5. Pen – I like flair pens, but I also like Ali’s Edwards precision pens as well.
  6. Glue pen.
  7. Washi tape of your choosing.

The printer fits in this handy little holder, which also holds the paper stickers. I chose the Canon Ivy over the HP pocket sprocket after reading loads of reviews saying that the HP printer created prints that were quite dark. I have to say, the prints from the Ivy are also dark, so I correct for that as much as I can in the Canon Ivy app. I like that it holds a charge for several days, connects quickly and easily to my phone, and the print quality is pretty decent for a travel printer.

All of the rest of my gear fits in a small, zipped bag. This one is from Ali Edwards, but I also have ones from Studio Calico. I tend to reuse the bags from subscription kits as they are more durable that a ziplock bag.

I have used traveler’s notebooks for three trips now, and I can say that I honestly enjoy them. I love looking back on my thoughts in the moment, and they give me an excuse to journal every day. It also helps to have a creative outlet while traveling, especially during Henry’s naps. I also enjoy the challenge of using a very constrained collection of materials. It forces me to use what I have, and to be both consistent and creative with my layouts.

This first traveler’s notebook was created during our three-week trip to Australia. I tried to have repeated elements day over day, such as the headings and stamps that I used. I also used washi tape to add ephemera collected along the way.

The next traveler’s notebook I created was for our trip to Europe this fall. I used a slightly different setup, mostly because I wanted a way to safely carry the large shipping tags from Ali Edward’s Travel Collection. This taller envelope fit not only the tags, but the notebook its self, which was nice. My gear setup, (scissors, printer, etc), was all the same. For this notebook, I even got Tom to write in it one day. I really like having his handwriting and voice included in this notebook.

So far, I have really enjoyed working with traveler’s notebooks, and I plan on continuing to use them for future travel.

As an Amazon Associate I earn from qualifying purchases .

Leave a Comment

November Day in the Life

Real talk, friends. My son and husband have been sick on and off for about three weeks now, and today the both got diagnosed with ear infections. I’m behind in laundry. I keep discovering surfaces in my house that are sticky with unknown substances. I’ve eaten way more crappy food than I care to admit simply because it is fast and easy. This is how life is sometimes. Messy. Yucky. Challenging.

In the midst of the mess, was the second “designated” day for the Day in the Life, a project spearheaded by Ali Edwards, where we are challenged to document the details of one day. It’s not a special day. It’s not a holiday. It’s just a day. Right now my life is messy. It’s sticky. It’s filled with snot and coughs and crying. But each day also has moments of joy, and this is the true beauty of this project. The invitation to be present in the mess. To be present in the mundane. To be present in the nitty, gritty, gross, fun, silly, belly-laugh moments of one day.

I haven’t historically liked the creation of these layouts. I have previously found them tedious, and even a little boring. I have been anxious to scrapbook about a big hike, or a recent trip, something fun, something flashy. However, as I have completed a few of these Day in the Life and Week in the Life projects, I have come to a realization. These projects are a gift to my future self. I absolutely LOVE going back to these albums and layouts and looking at the snapshot of what life was like at that specific moment in time. I love to see how things change, and what I was struggling with. I love being reminded of the fact that I was really craving peanut butter and jelly English muffins when I was eight weeks pregnant. I love seeing those boring, mundane details. Because these, truly, are the stuff of real life.

In order to try and make the layouts a little more interesting for me to compete this time, I tried playing with different elements from the recent Product Play 3, and playing with products and processes I’ve been enjoying recently, such as adding dimension, and playing more with my stamps. I chose to complete this project in a hybrid style this year, mostly because I knew that during the first DITL in February, I would have a five month old, and the ease of literally just filling in journaling and popping in photos in Photoshop was the only way this was going to get done. For this November day, I was able to be a bit more crafty, and added elements from the recent Foodie kit, the Baby, Rest, Tough, and Watch Story Kits from Ali Edwards, the amazing Freshly Baked stamp set from Kelly Purkey, and some stickers from both Ali Edwards and Studio Calico. I like that the Hybrid approach allows for so much freedom and flexibility.

One way I added dimension for this project was to use Avery index tabs. Ali talked about finding more space in a smaller album by using folded page protectors to either add or hide journaling, or to add more space for photos. I used this technique on two of my pages for this day.

Another way I added dimension was by using pop dots. These adhesive dots allow for various elements to literally POP off the page. I have really enjoyed using these in my layouts recently, especially to add emphasis to stamps.

Finally, I have stuck with the pledge I made to myself to use my stamps more, and I dug into my stamp box frequently for this project. It has been fun finding just the “right” stamp for any given layout.

All in all, I found this November edition of Day in the Life much more enjoyable than those past. It is still a gift to my future self, and one I will come back to again and again.

Leave a Comment